Smart Forms for monday.com
Learn how to upscale your customer data management and analysis from forms in monday.com.

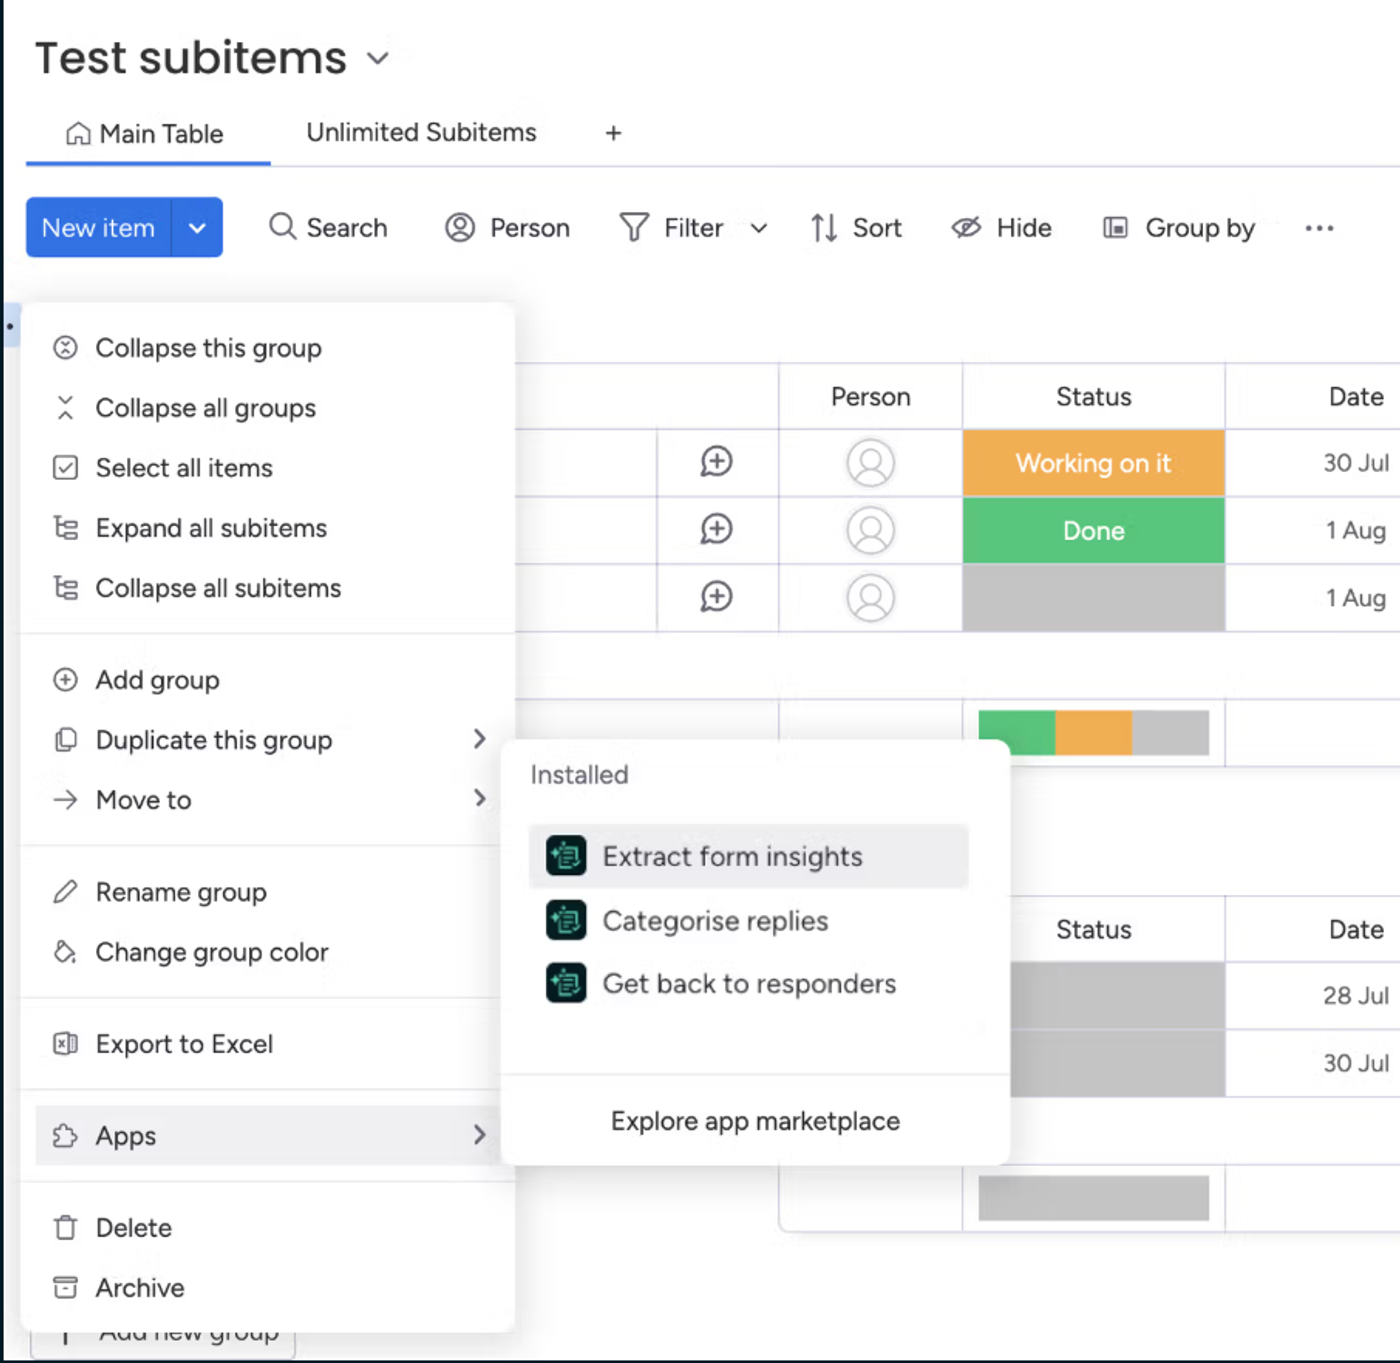
Thanks for installing Smart Forms for monday.com! Once the app is installed from the marketplace, click on the three dots next to the Group Title on your monday.com board and go to the apps section. There you will see all three features available to you with the Smart Forms app. Then just click on one of the features of Smart Forms you want to use.
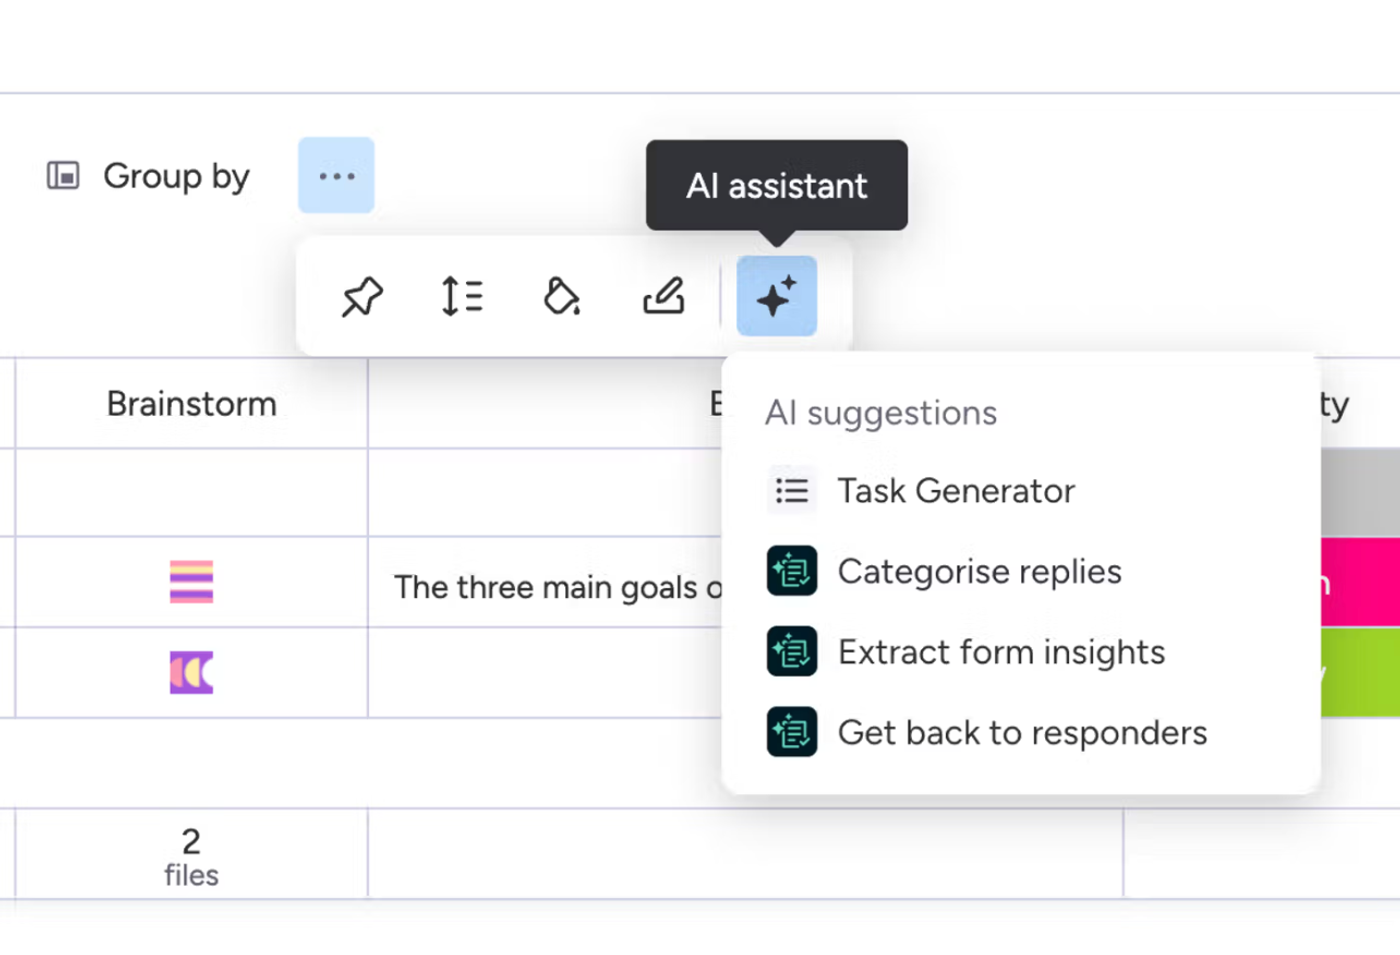
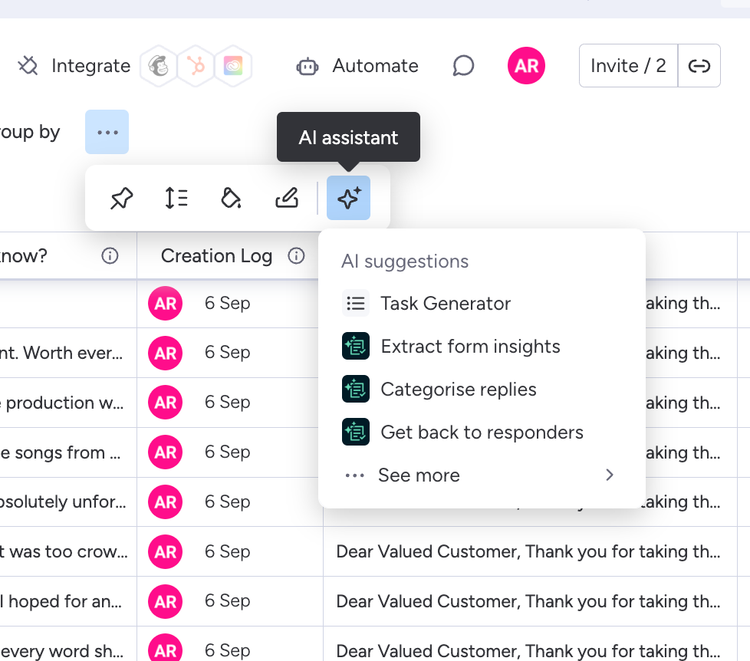
You can also access the app through the AI assistant if you have it activated.
App walkthrough
Watch Amalia, the Smart Forms Product Marketing Manager, take you through a complete tour of the app's features and functionality.
The concept
Our first award-winning AI-powered solution: Smart Forms. Designed to help you gain valuable insights from your customers and better optimise how you extract and analyse your data, Smart Forms will help you unlock the potential of AI in monday.com! With this app you can:
- Easily structure your data by categorising your responses.
- Conveniently create dedicated summary boards for your insights.
- Keep communication open with personalised responses.
How to use the app
Save valuable time by automating the analysis and categorisation of qualitative information and communicate directly with your respondents.
Extract form insights
Conveniently create dedicated summary boards for your insights
- Select the ‘Extract insights’ feature.
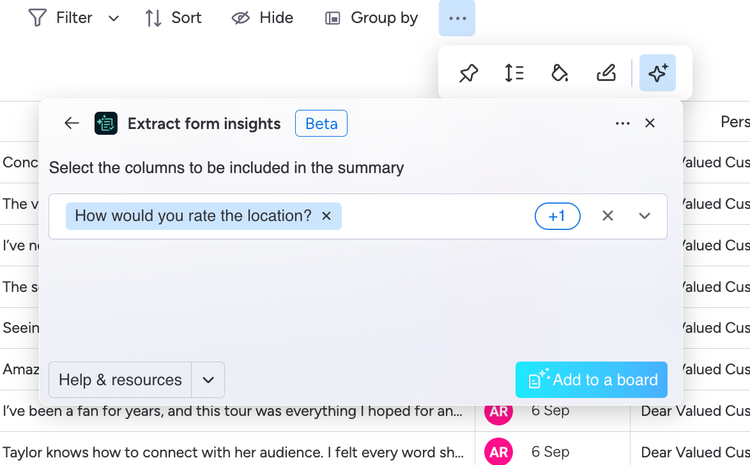
- You'll then see a dropdown menu asking you to select the columns you'd like to include in your summary board.
- The options given in the dropdown will reflect the questions in your survey.
- Select which questions you would like a summary for (in the example below, we've selected all questions from our survey, meaning we want a summary for all the data).
- Next, click ‘Add to board'. Smart Forms will then automatically create a new board for your summary data, which you can access on the left-hand side alongside your existing boards.
*You may experience an error if you have more than 10 ítems in a column with "long-text" with more than 2000 characters in each cell.
Categorise replies
Easily structure your data by categorising your responses
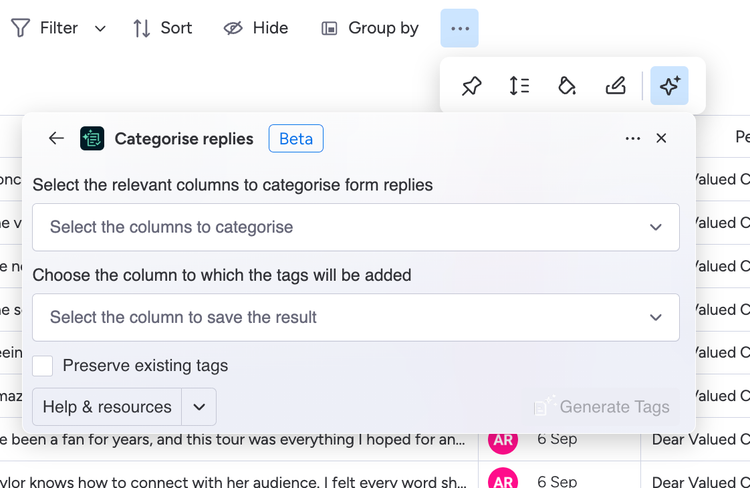
- Select the ‘Categorise replies’ feature.
- Select the relevant columns to categorise form replies: this dropdown menu will show the questions you have in your questionnaire or survey and will allow you to select the relevant column in your board.
- Choose the column to which the tags will be added. Here we create the tags to help you categorise your column data. Select the dropdown menu and hit ‘+ Create new tag columns', then click the ‘Generate tags' button.
- You must then reload the page to have Smart Forms automatically create a new ‘Tags’ column and generate bespoke tags based on the responses provided.
*You may experience an error if you have more than 10 ítems in a column with "long-text" with more than 2000 characters in each cell.
Keep communication open with personalised responses
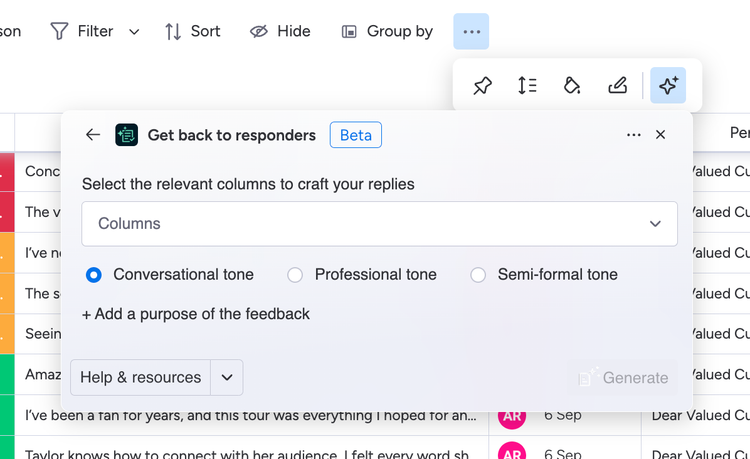
- Select the ‘Get back to responders’ feature.
- There will be a dropdown menu where you can select the questions you want to create responses for (again in this example, we have selected all the questions).
- You can then select the tone of the response from the options: 'Conversational', ‘Professional’ or ‘Semi-formal’ (we have selected ‘Conversational’).
- Next, type in the purpose of the response you're sending, for example: ‘I want to thank the person for their response’.
- After completing these steps, click the ‘Generate’ button. Smart Forms will then generate personalised responses and automatically add them to a newly-created ‘Personalised responses’ column. From there you can hover over the items in that column to view the full response, and you can edit these at any time.
*You may experience an error if you have more than 10 columns "long-text" with more than 2000 characters in each cell.
Conveniently create dedicated summary boards for your insights
- Select the ‘Extract insights’ feature.
- You'll then see a dropdown menu asking you to select the columns you'd like to include in your summary board.
- The options given in the dropdown will reflect the questions in your survey.
- Select which questions you would like a summary for (in the example below, we've selected all questions from our survey, meaning we want a summary for all the data).
- Next, click ‘Add to board'. Smart Forms will then automatically create a new board for your summary data, which you can access on the left-hand side alongside your existing boards.
*You may experience an error if you have more than 10 ítems in a column with "long-text" with more than 2000 characters in each cell.

Easily structure your data by categorising your responses
- Select the ‘Categorise replies’ feature.
- Select the relevant columns to categorise form replies: this dropdown menu will show the questions you have in your questionnaire or survey and will allow you to select the relevant column in your board.
- Choose the column to which the tags will be added. Here we create the tags to help you categorise your column data. Select the dropdown menu and hit ‘+ Create new tag columns', then click the ‘Generate tags' button.
- You must then reload the page to have Smart Forms automatically create a new ‘Tags’ column and generate bespoke tags based on the responses provided.
*You may experience an error if you have more than 10 ítems in a column with "long-text" with more than 2000 characters in each cell.

What is Smart Forms for monday.com?
Smart Forms is our AI-based app for monday.com that simplifies managing and analysing your customer feedback from form responses. Our app streamlines communication with respondents, categorises qualitative data, generates personalised replies and efficiently organises responses.
How does Smart Forms for monday.com save time in my workflow?
Smart Forms for monday.com automates the handling, categorisation and organisation of form responses, improving communication with personalised response options.
Can I use Smart Forms for monday.com to analyse the feedback I receive through forms and surveys?
Yes, Smart Forms for monday.com allows you to automatically analyse and categorise qualitative information provided by form respondents, making it easier to draw valuable insights from your data.
How does Smart Forms for monday.com help me to communicate with form respondents?
The ‘Get back to responders’ feature generates customised responses based on the feedback provided, enabling efficient and effective communication with your respondents.
Can I extract form data onto a dedicated board with Smart Forms for monday.com?
The ‘Extract form insights’ feature creates a dedicated dashboard where you can analyse responses to each form question, providing organised and comprehensive insights.
Is Smart Forms compatible with all types of forms in monday.com?
Smart Forms for monday.com is compatible with WorkForms and other form integrations on the platform.
Where can I learn how to use Smart Forms for monday.com?
You can check out our intro blog, documentation and our demo video to help you get started with the app.
Is pricing per user or per account?
The pricing is per account and it is based on the number of users the account has.
Who can use Smart Forms for monday.com?
Any user with access to a monday.com account with an active Smart Forms license.
Where can I purchase a plan?
Smart Forms supports billing through monday.com. Ensure the app is installed in your account first and then complete the following steps:
- Click on the 'Installed Apps' button located at the top-right corner of the apps marketplace. Click on 'Smart Forms'.
- You will be redirected to the app's main page. Click on the 'Billing' tab in the menu at the top-left of your screen.
- Once in the 'Billing' tab, click 'Upgrade plan'.
- Choose a plan based on what works best for you and your team! Once you select a plan, click 'Continue to checkout' at the bottom-right corner of your screen.
Pay by credit card or PayPal and click 'Complete your purchase' at the bottom-right corner of your screen.
Can I change my plan?
If you purchased a paid plan and want to change it before it is renewed, please contact us through our support portal. If you are still in the trial phase, just cancel the current plan and purchase the one you prefer.
What about privacy and security?
Visit our End User License Agreement and Privacy Policy for more information.
Share your feedback
Have an idea for how we can improve Smart Forms? We'd love to hear from you! All suggestions and feature requests are very welcome. You can submit your feedback by completing the feedback form or contacting us directly. Either way, we’ll get back ASAP!
Need some help?
Our dedicated support team is on hand to get you where you want to be. Just raise a ticket in our support portal, and we’ll get back to you as soon as we can to see how we can help!