Step-by-step: how to integrate Jira with Azure
Share on socials
Step-by-step: how to integrate Jira with Azure to boost your security and compliance

Georges Petrequin
16 October 2024
9 min read

Georges Petrequin
16 October 2024
9 min read
Jump to Section
Jump to section
Why integrate Jira with your Azure cloud storage?
1. Centralise your file storage and boost security
2. Streamline your compliance process
3. Save on storage costs
Integrate Jira with your own Azure storage account
1. Create a storage account for the container
2. Setting up CORs in Azure
3. Configuring your Blob container
4. Finding your Azure access key
Setting up Data Control for Jira for the first time
1. Configuring the app
2. Uploading files to Azure from your Jira issues
Wrapping up
If your organisation has rigorous security and compliance requirements, you can't rely on Jira's native storage options. With Data Control for Jira, you can instantly connect Jira to your own Azure cloud storage servers for security, compliance, and cost savings! Discover how in our step-by-step guide.
While Jira's native file storage works for a large number of users, if your organisation needs more granular control over where your data is stored and has strict compliance requirements, then you need a better solution.
Fortunately, there's a simple way to gain the control you need over your organisation's data—without leaving Jira.
Integrating Jira with your existing Azure cloud storage using our Jira Cloud app, Data Control for Jira.
With this app and integration, you can securely store files in your Azure account and access them directly from Jira issues. In this guide, I'll walk you through setting it up using Data Control for Jira, enhancing your security, simplifying compliance, and reducing storage costs. Let's get started.
Why integrate Jira with your Azure cloud storage?
There are plenty of great reasons to use your organisation's existing Azure cloud storage instead of relying on Jira's native storage for your important files. Let's dive into them.
1. Centralise your file storage and boost security
The first benefit to using Data Control for Jira to integrate Jira with your Azure storage is that you're instantly centralising where your important files are stored.
Rather than uploading files and attachments to Jira and having them automatically stored in Atlassian's servers (which use AWS), every file gets automatically added to your own Azure storage. This means your data is all in one safe, central location, giving you and your team some much-needed peace of mind.
2. Streamline your compliance process
GDPR, HIPAA, SOC 2… the list of regulations we need to comply with can feel endless.
Storing your data—which could include everything from team member personal information to sensitive customer details stored on Jira tickets—across multiple platforms is a surefire way to complicate your compliance team's day. They need to consider which data is being processed on these different platforms and factor in things like data residency requirements which will affect your compliance strategy.
Centralising your file storage in your own Azure cloud server is a perfect way to streamline your compliance audits, make data residency audits a breeze, and boost the overall confidence in your Atlassian compliance strategy with your stakeholders.
3. Save on storage costs
The third major benefit is the cost savings. If you hit your Jira Cloud Standard storage limit (250GB), you'll have to upgrade to Jira Cloud Premium.
For an organisation with 250 users on Jira, this means you'll pay $7.43 per user per month instead of $13.36 per month.
If you don't need any of the other Jira Cloud Premium features, that's a hefty price to pay just for more storage, especially considering data storage prices on Azure start at $0.15 per gigabyte—and the more data you store, the cheaper it gets.
Integrate Jira with your own Azure storage account for security and cost-savings
Connecting Jira to Azure is a breeze with our app for Jira Cloud, Data Control for Jira.
It takes just minutes to set up, and you'll immediately see the benefits of improved security, streamlined compliance, and cost savings, all thanks to being able to leverage the power and flexibility of your organisation's existing Azure cloud storage, right from Jira.
If you're already thinking: 'How secure is your app, and can I trust it with my data?', then don't worry—we've got you covered. All Data Control for Jira does is connect your existing Jira and Azure storage accounts together—we don't process any of your sensitive data. If you have any specific questions, just reach out to our team, and we'll be happy to answer any questions you have. You can also read about our privacy and security practices on the app marketplace listing.
As well as Azure, Data Control for Jira can also integrate Jira with your AWS storage and Jira with your Google Cloud Storage.
Next, let's dive into the simple process for integrating Jira with Azure using Data Control for Jira.
Preparing for the integration
First things first: Data Control for Jira connects to your Azure storage using shared access signatures (SAS). For a deep dive into what this means and how to use SAS with Azure, check out Microsoft's documentation.
Next, you'll need three pieces of key information at hand to configure your new integration:
- Your Storage Account Name.
- Your Container Name.
- Your Access Key.
You'll also need a Data Control for Jira-compatible storage location ready in Azure. Here's how to set that up:
1. Create a storage account for the container
If you already have a storage account ready to integrate with Data Control for Jira, then skip ahead! If not, here's how to create one:
- From the Azure portal home, click 'Storage Accounts'.
- Click 'Create' to make your new account.
- You can follow your internal naming scheme and best practices, but make sure to note down the Storage Account Name, as you'll need this to integrate Azure with Data Control for Jira. You can set up all of the other sections in the storage account (Advanced, Networking, Data Protection, Encryption, Tags) based on your internal best practices and requirements.
- Review and create your storage account.
Once you have your storage account in place, you'll need to set up Cross-Origin Resource Sharing (CORS).
2. Setting up CORs in Azure
Setting up CORs in Azure is simple, but you need to know where to look. Here's the process:
1. Navigate to your Storage Account.
2. From the left menu, select 'Settings', then 'Resource sharing (CORS).'
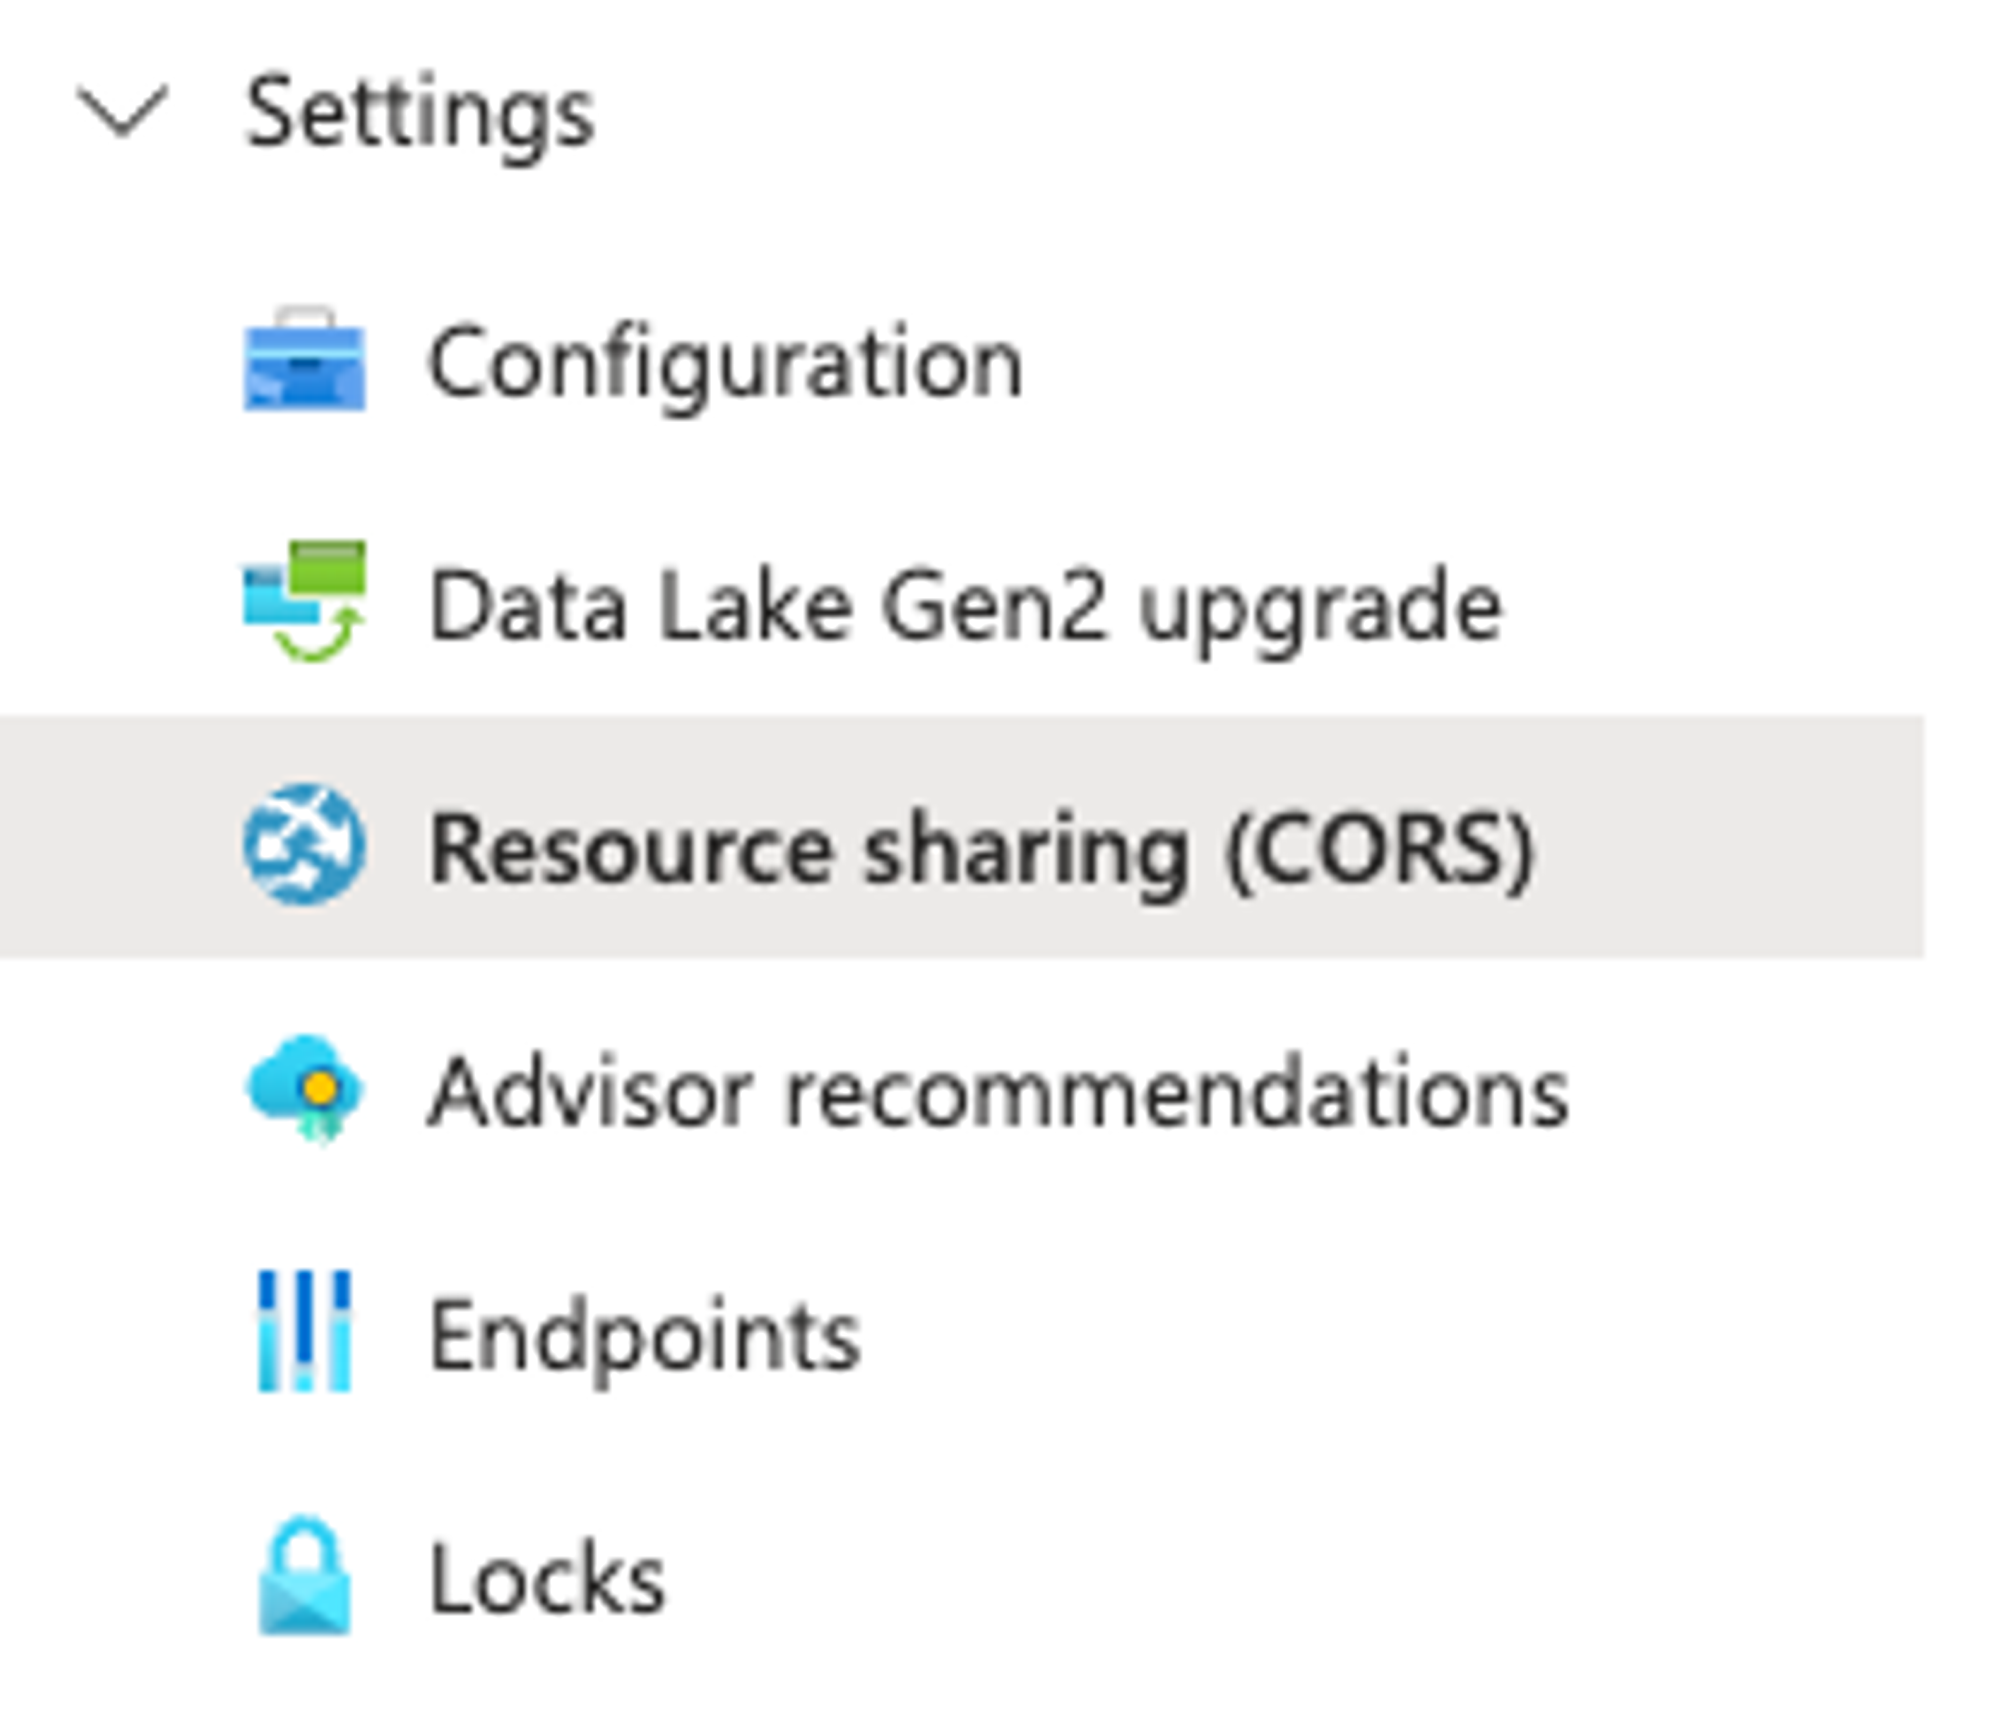
3. Select the Blob service tab.
4. Add a new entry to the table with the following information:
- Allowed Origins : *
- Allowed Methods: DELETE, GET, HEAD, PUT, OPTIONS
- Allowed Headers: *
- Exposed Headers: *
- Max age: 100

5. 'Save' your changes.
Now, it's time to set up your container.
3. Configuring your Blob container
While you're in your Storage Account, you'll need to configure your container.
Your container name is required by Data Control for Jira, and it's an essential step.
Here's how to do it:
1. While in your target Storage account, select 'Storage Browser' from the left-hand menu and then 'Blob containers'.

2. Click 'Add Container'.
3. Name your container, and make sure the Anonymous access level should be left as 'Private (no anonymous access)'.
4. Click 'Create' to finalise the creation of your new storage container.
Make sure to save your container name, as you'll need this later!
4. Finding your Azure access key
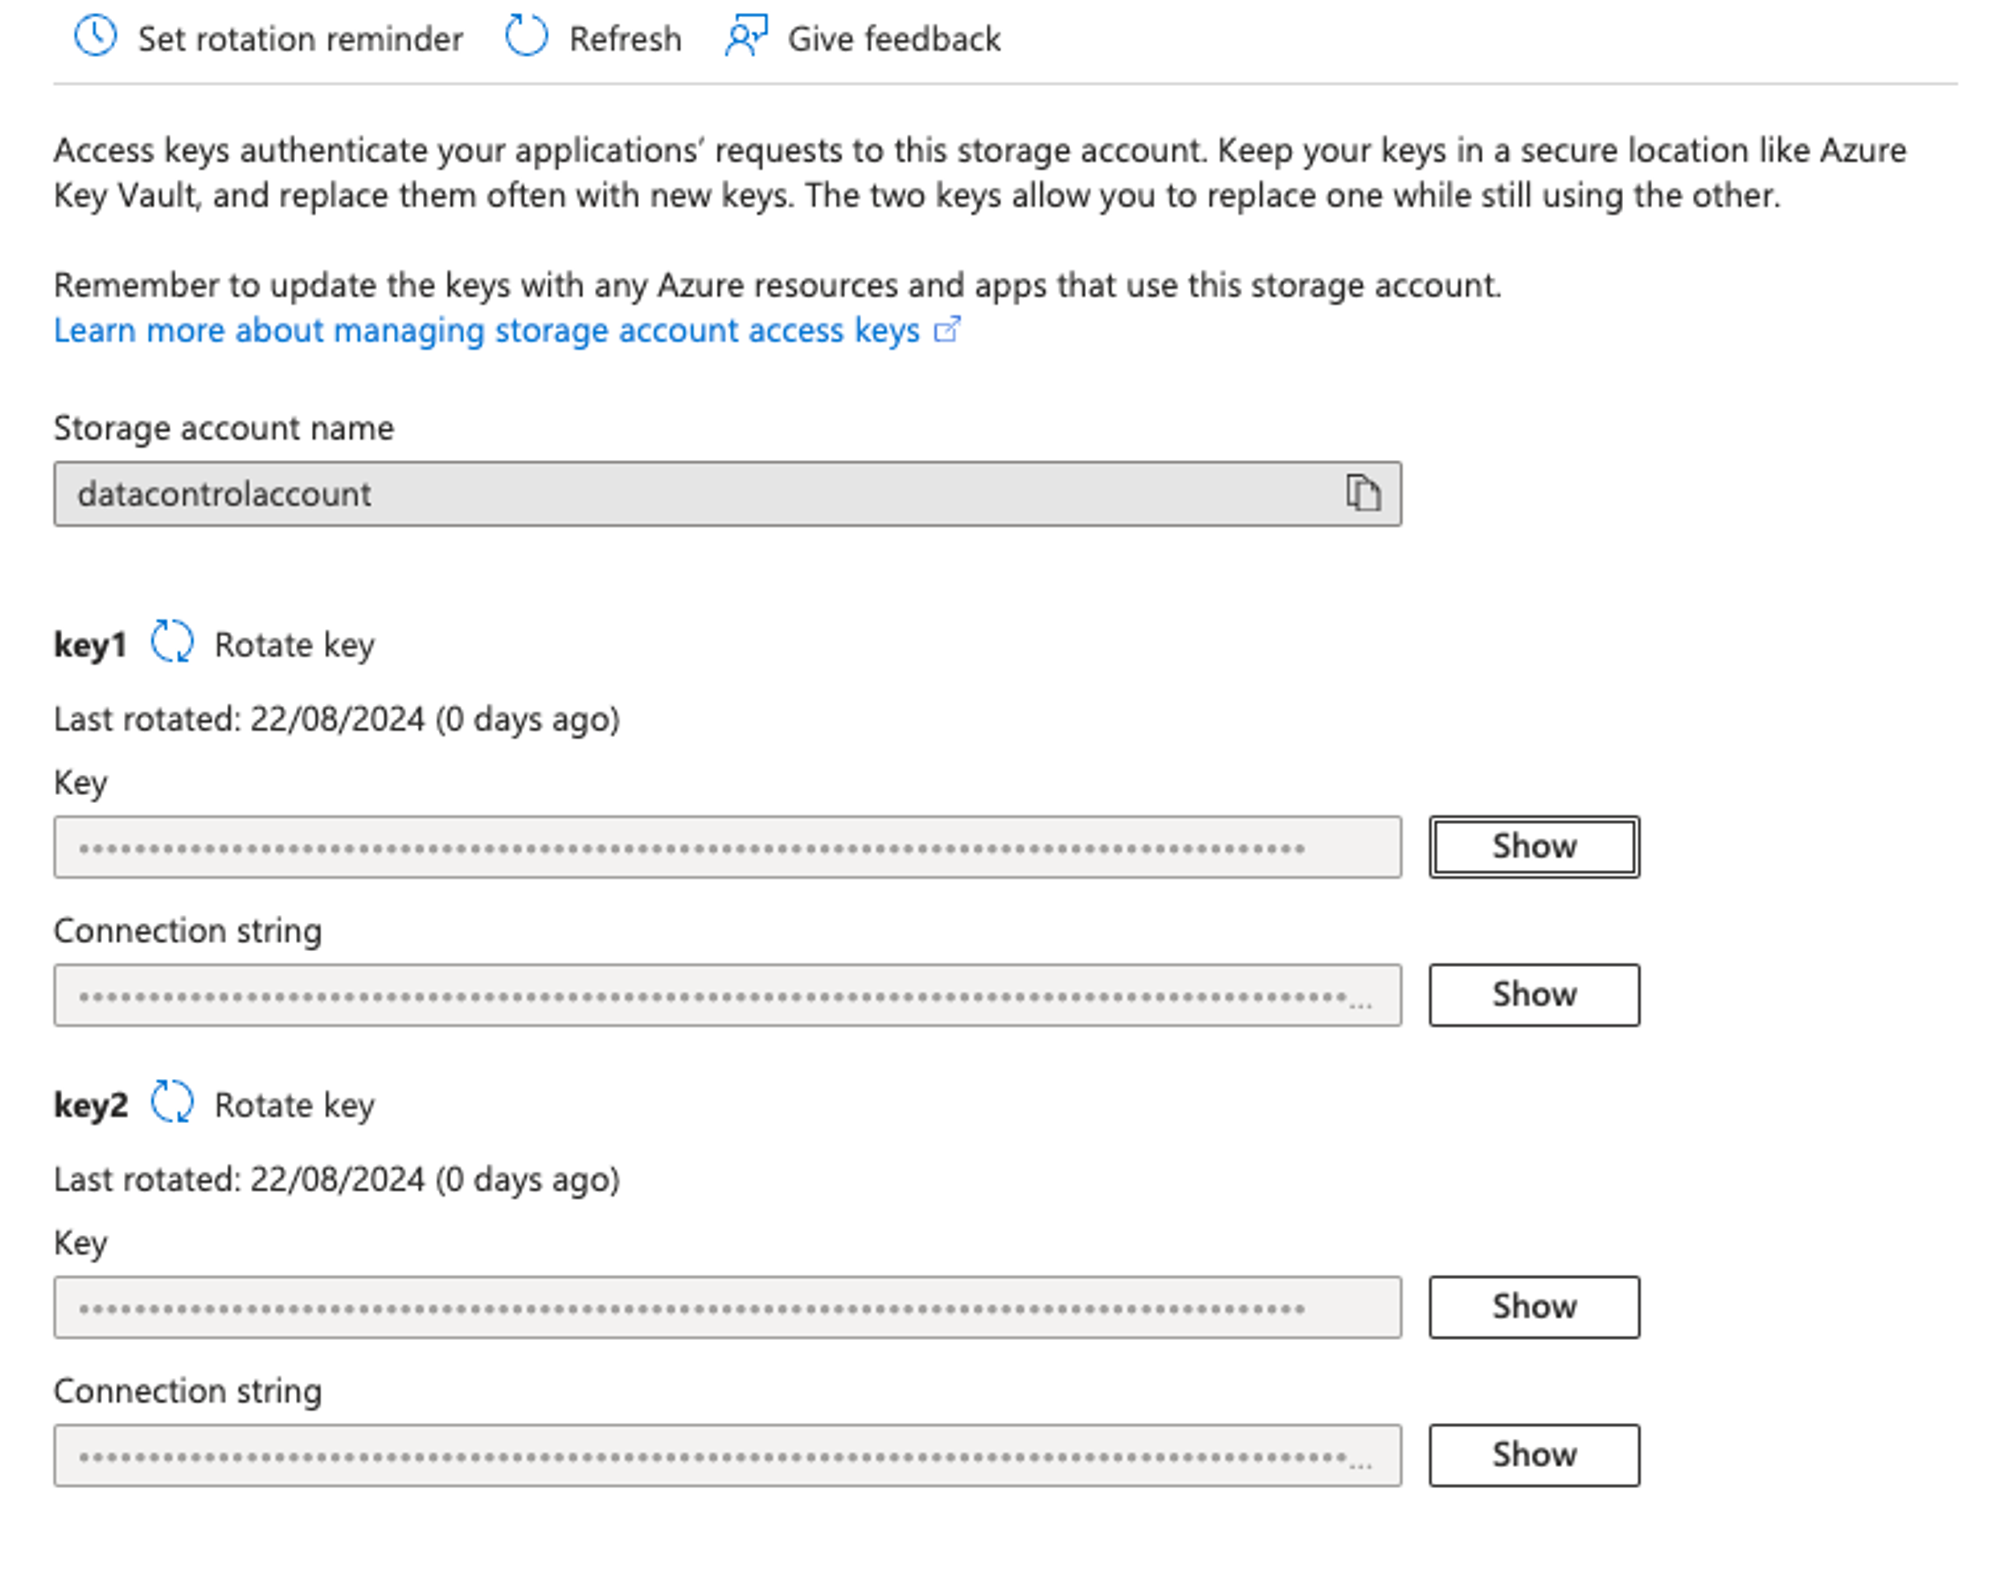
The final step in configuring your Azure account, ready for your new integration, is to find your access key. Here's how to find it:
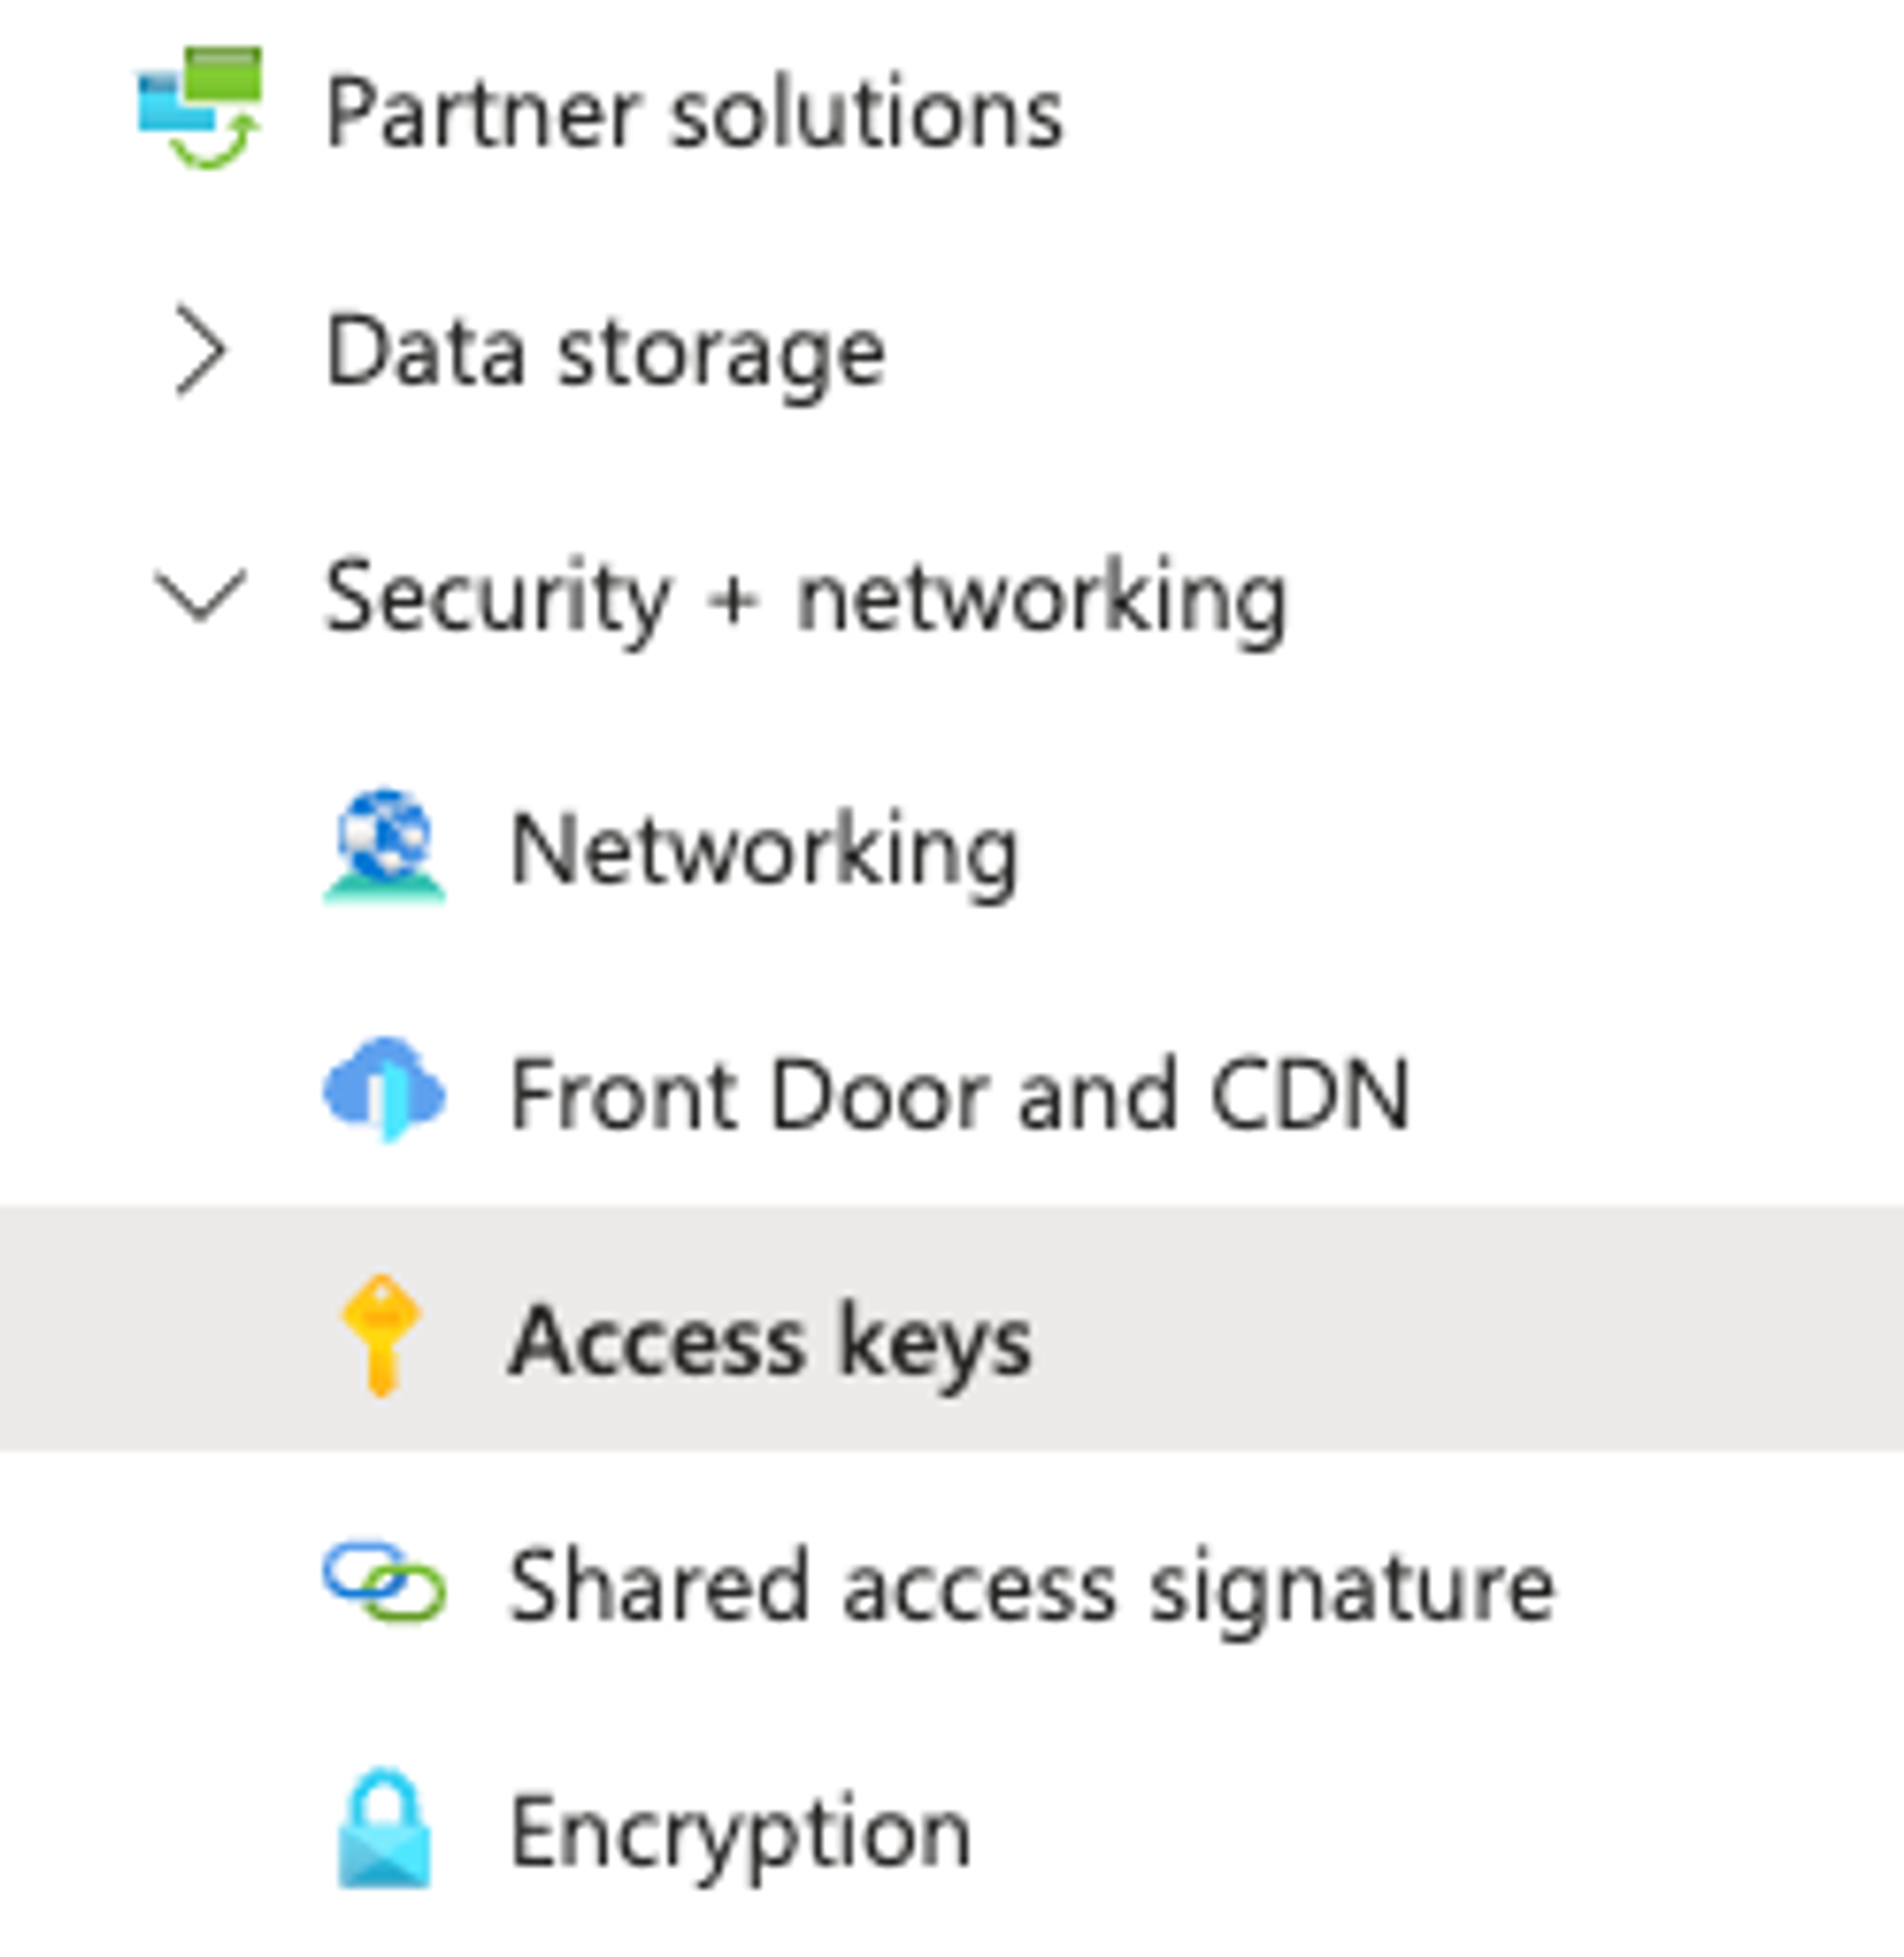
1. In your target storage account, select 'Security + networking' from the left-hand menu and then click 'Access keys'.
2. In this window, click 'Show' and copy either of the keys, which are now ready for use in the Data Control for Jira configuration.
And that's it! You've now configured your Azure account and have all the information you need to set up your new Jira to Azure integration.
Setting up Data Control for Jira for the first time
Now that your Azure account is ready for integration, it's time to install and set up your new app, Data Control for Jira.
Head to the Atlassian Marketplace and install Data Control for Jira. You can start with a free 30-day trial to see if it's the right fit for your needs.
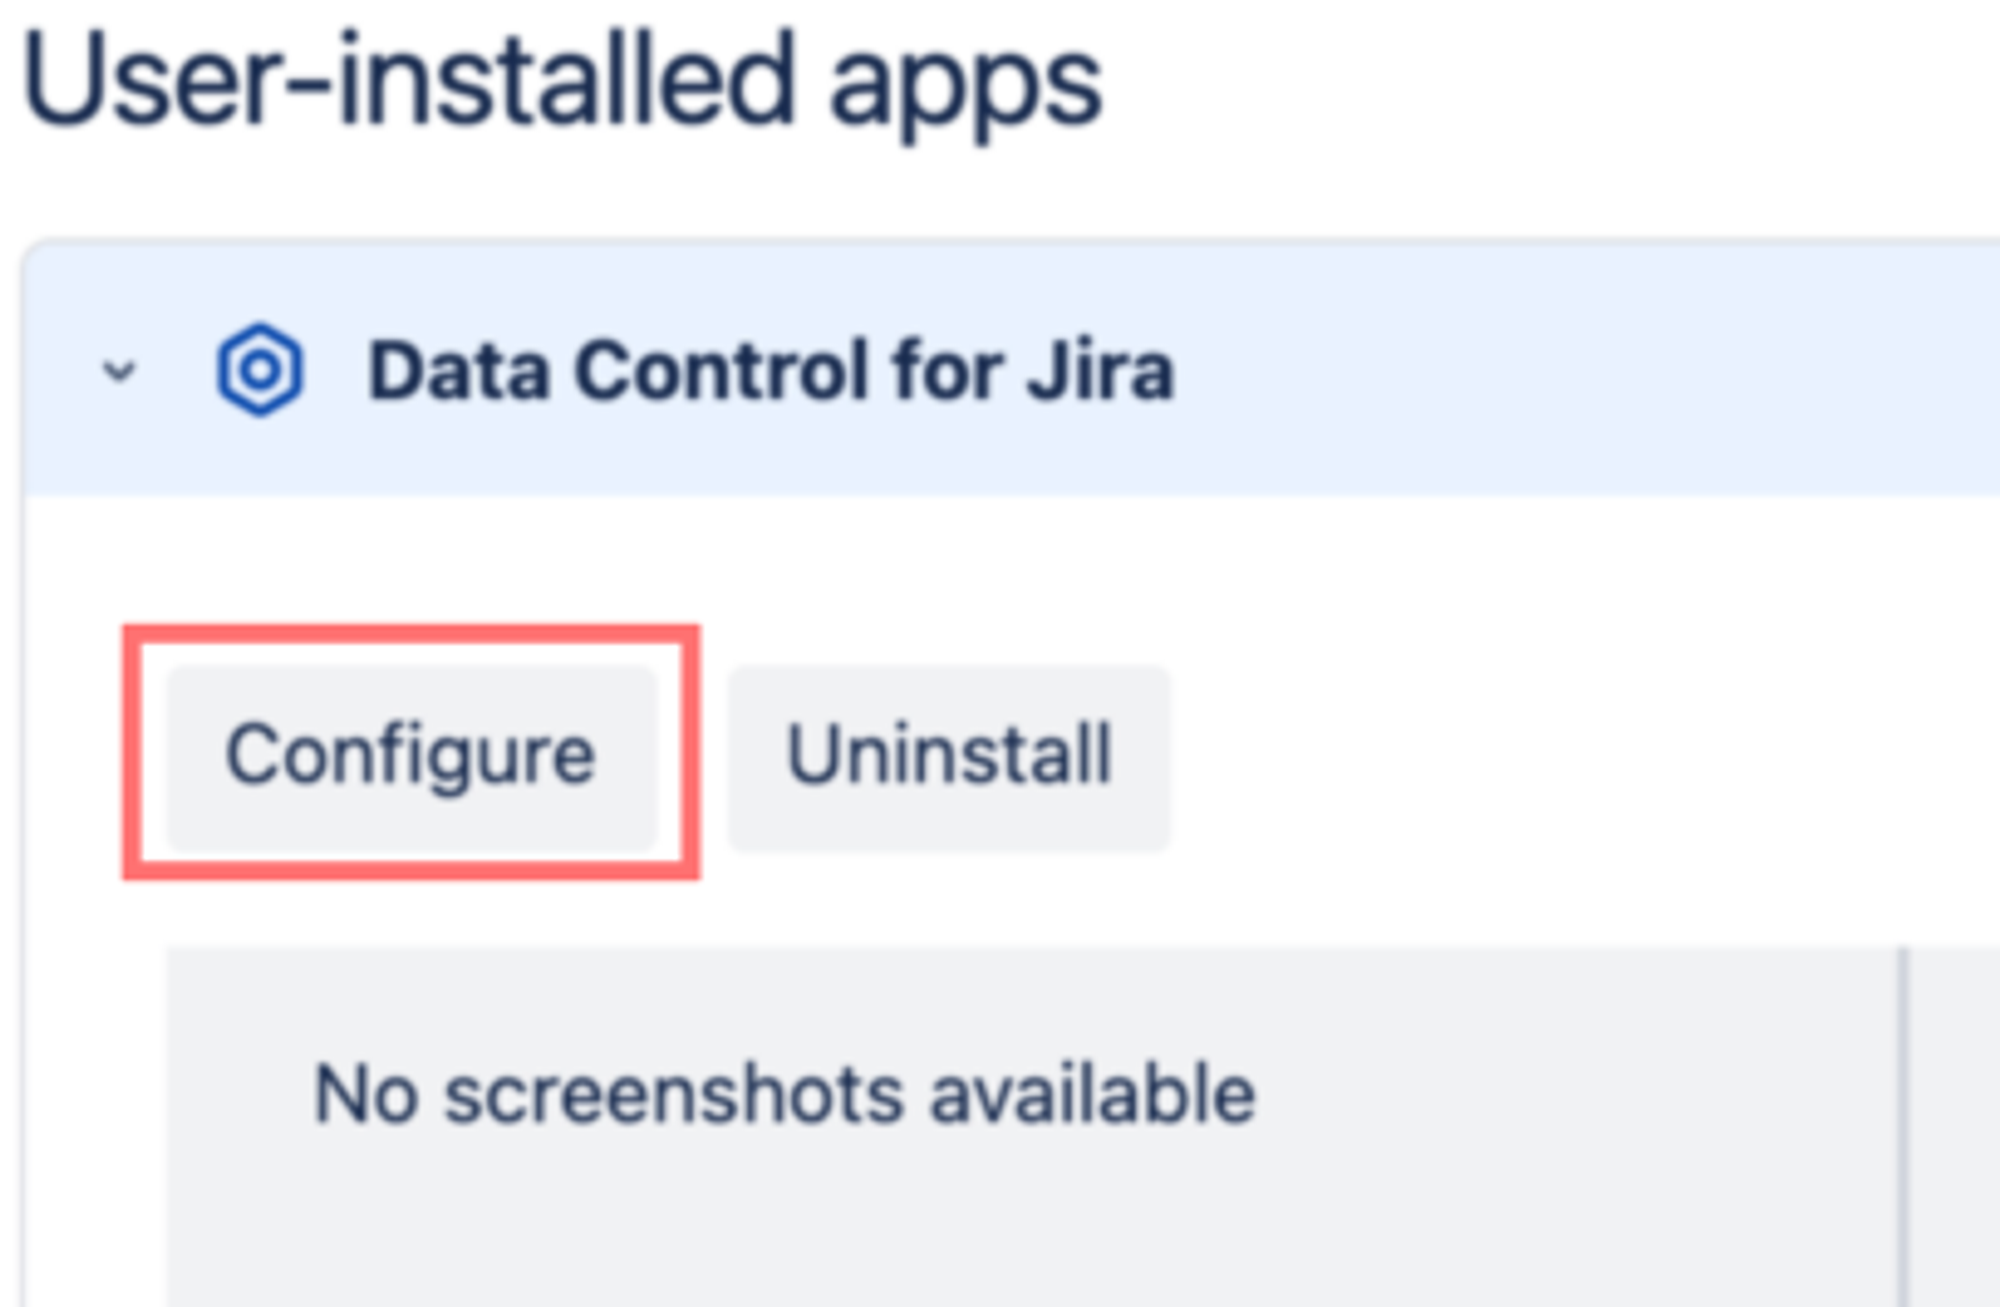
1. Configuring the app
You'll need to either be a Jira administrator, or ask your Jira admin to enable the app to use for everyone on your team in the configuration.
As mentioned above, you'll need a few details at hand:
- Storage account name.
- Storage account key.
- Container name.
Add these into the Data Control for Jira configuration, and hit 'Save'.

If your details are correct, you should instantly see the green 'Connected' icon appear.

And that's it! Your integration is now live, and you'll see a new field in your Jira issues across your instance.
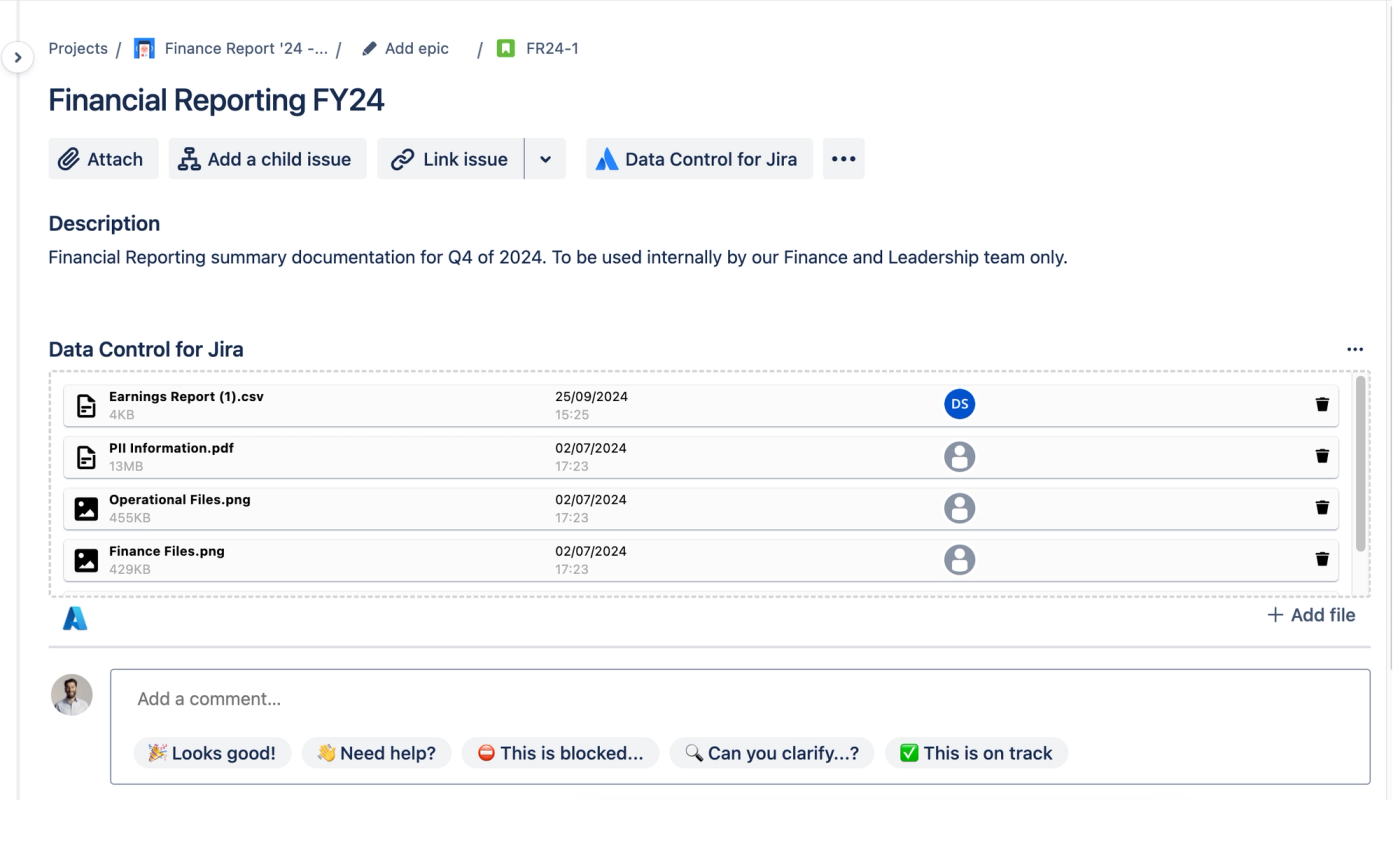
2. Uploading files to Azure from Jira
Now that your new app is installed and ready, your team can start uploading files to Jira issues and they'll automatically be stored in your Azure storage.
As you would expect, these files will still be accessible from your Jira issues, exactly as they would be if you were relying on Jira's native storage.
Just like that, all of your important files can be safely stored in your Azure storage.
It's a powerful and simple way to instantly leverage the power of your organisation's existing cloud storage, right from Jira.
Your compliance team will thank you for the security and compliance benefits, and your finance team will be glad that you don't have to pay for Jira Cloud Premium's more expensive tiers simply to boost your storage capacity.
Your team won't notice any differences in their workflow, making adoption nice a simple.
Wrapping up: why a Jira and Azure storage integration is a must-have feature for your team
Integrating Jira with your Azure storage using Data Control for Jira is a simple but incredibly powerful way to overcome the limitations of Jira's native storage options.
Your team can leverage the flexibility and cost savings provided by your organisation's existing Azure cloud storage, without ever needing to leave your familiar Jira interface.
You'll centralise your file storage for better security, streamline your compliance processes, and save a chunk of change on storage costs.
Ready to integrate Jira with Azure?
Get started today by installing Data Control for Jira via the Atlassian Marketplace and see the benefits of your new Jira to Azure integration for yourself! There's a completely free 30-day trial.
Interested and want to learn more before installing? Then book a free personalised demo of the app with our friendly team!
Related Content
Read more


Jira
InfoSec & Compliance
Related Content
Read more