How to export from Jira to Microsoft Excel: 2 easy methods
Share on socials
How to export from Jira to Microsoft Excel: 2 easy methods

Wilson Ong
22 August 2024
4 min read

Wilson Ong
22 August 2024
4 min read
Jump to Section
Jump to section
Why export from Jira to Excel?
How to export from Jira to Excel
Option A: Jira's built-in export feature
Option B: Use Hierarchy for Jira to export your entire Jira hierarchy
There are two main ways to export from Jira to Microsoft Excel: use Jira's native export feature, or, use Hierarchy for Jira if you need to export your entire multi-level issue hierarchy.
Microsoft Excel is a Project Manager's secret weapon. It's a Swiss Army knife for your data: from basic data storage to building fancy reports based on complex calculations, it can handle almost anything you throw at it.
But here's the catch: Excel is only as good as the data you feed it. And for many of us, that goldmine of information is tucked away in Jira.
So, how do we combine Jira's treasure trove of insights with the power of Excel? And, is there an easy way to export your issues from Jira to Excel, enabling you to share them with key stakeholders in your organisation?
Let's find out.
Why export from Jira to Excel?
Think of your Jira issues and data as the single source of truth for your project management.
Because Jira contains all of your important data, it also has the answers to the key questions you're asking:
- How are your teams tracking towards their key performance indicators?
- When is a project likely to be completed?
By exporting your Jira issues to a CSV and then opening the CSV in Excel, you'll get access to all new insights. You'll be able to manipulate that data, visualise it in interesting ways, and generate every type of custom report you could ever need.
How to export from Jira to Excel: two methods
Option A: export from Jira to Excel using Jira's built-in export feature
The first way to export Jira issues to a CSV for use in Excel is by using Jira's built-in export feature. To do this:
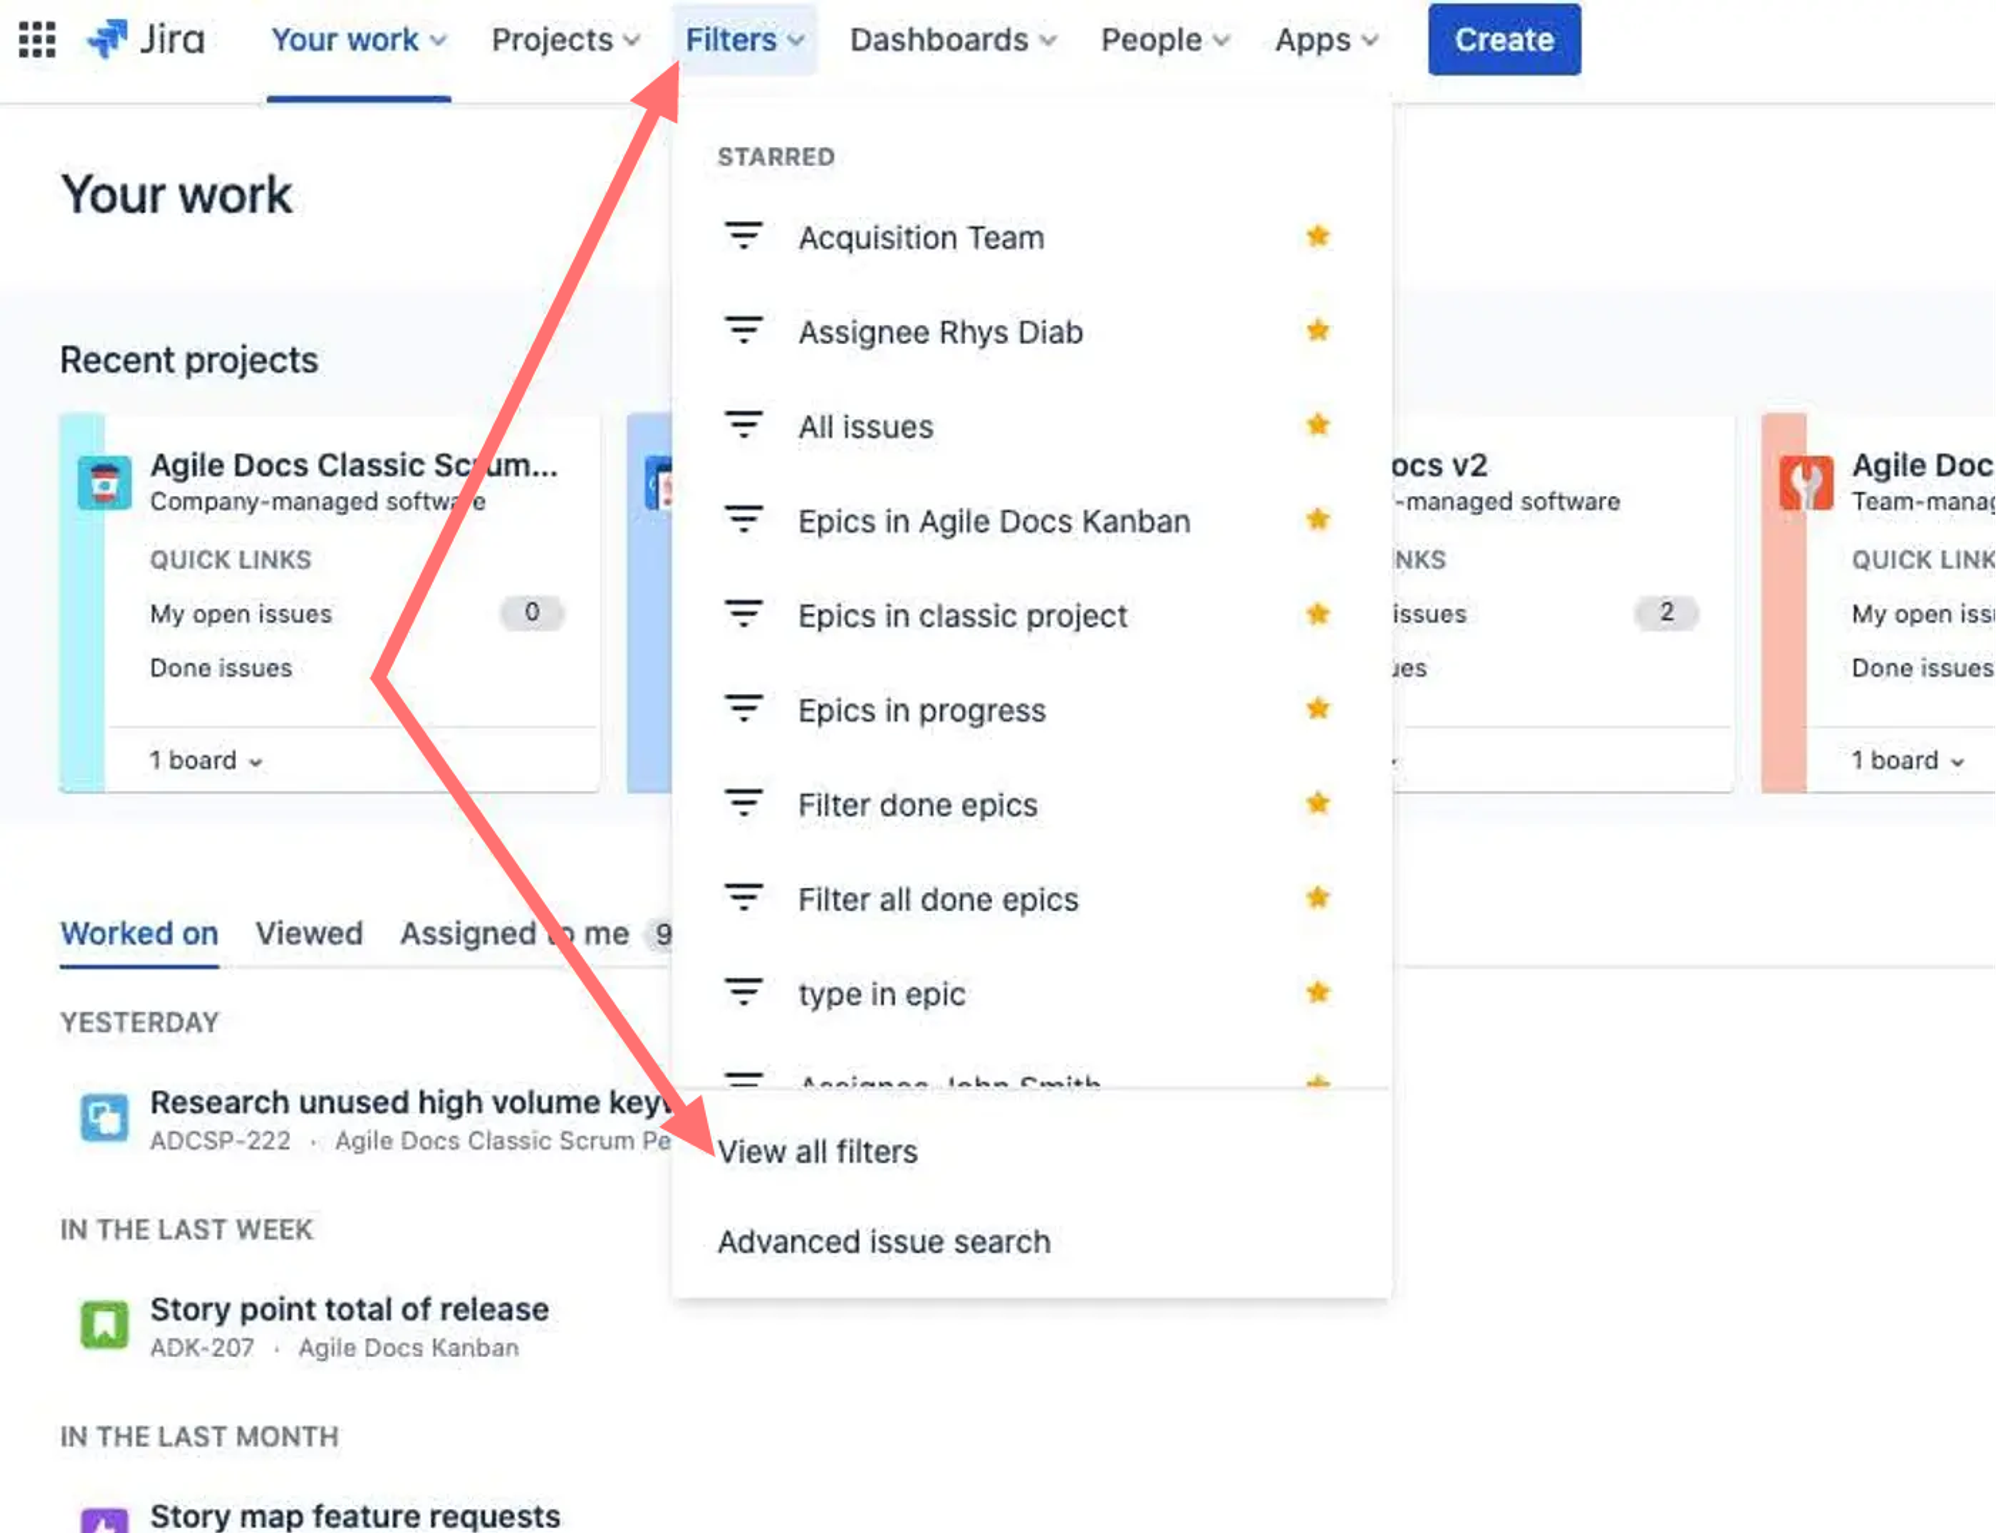
1) Go to 'Filters' and then 'View all filters'.
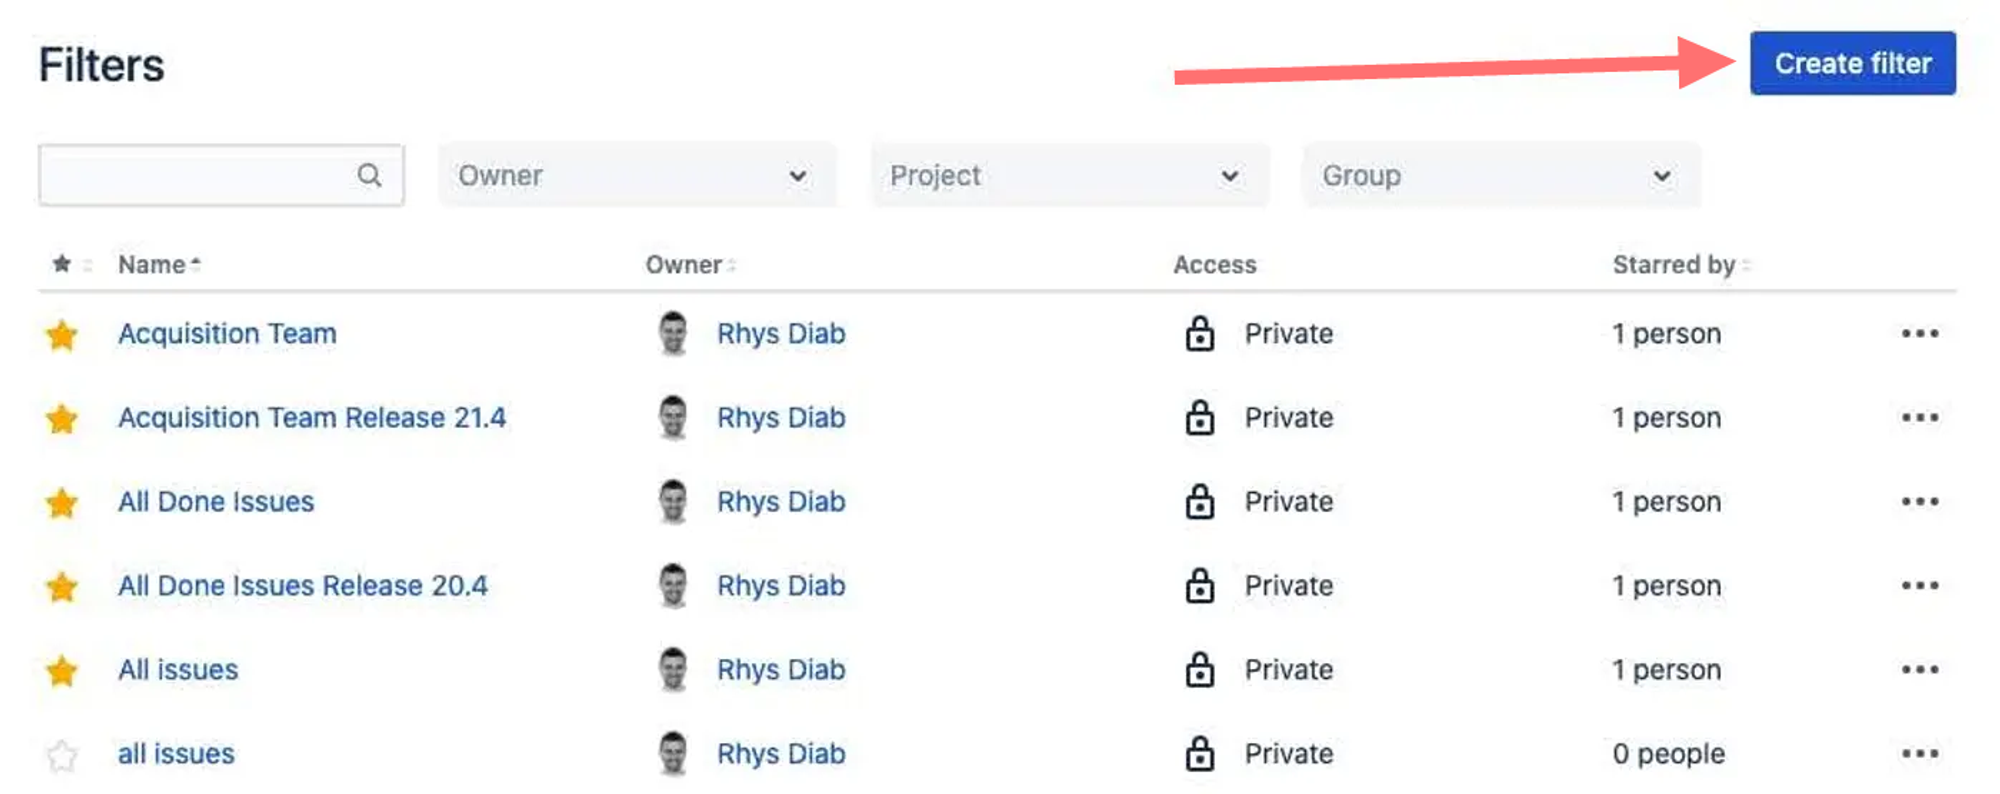
2) Select 'Create filter'.
3) Enter a JQL query to bring up the issues you want to export. You can use Jira's built-in JQL queries for this.
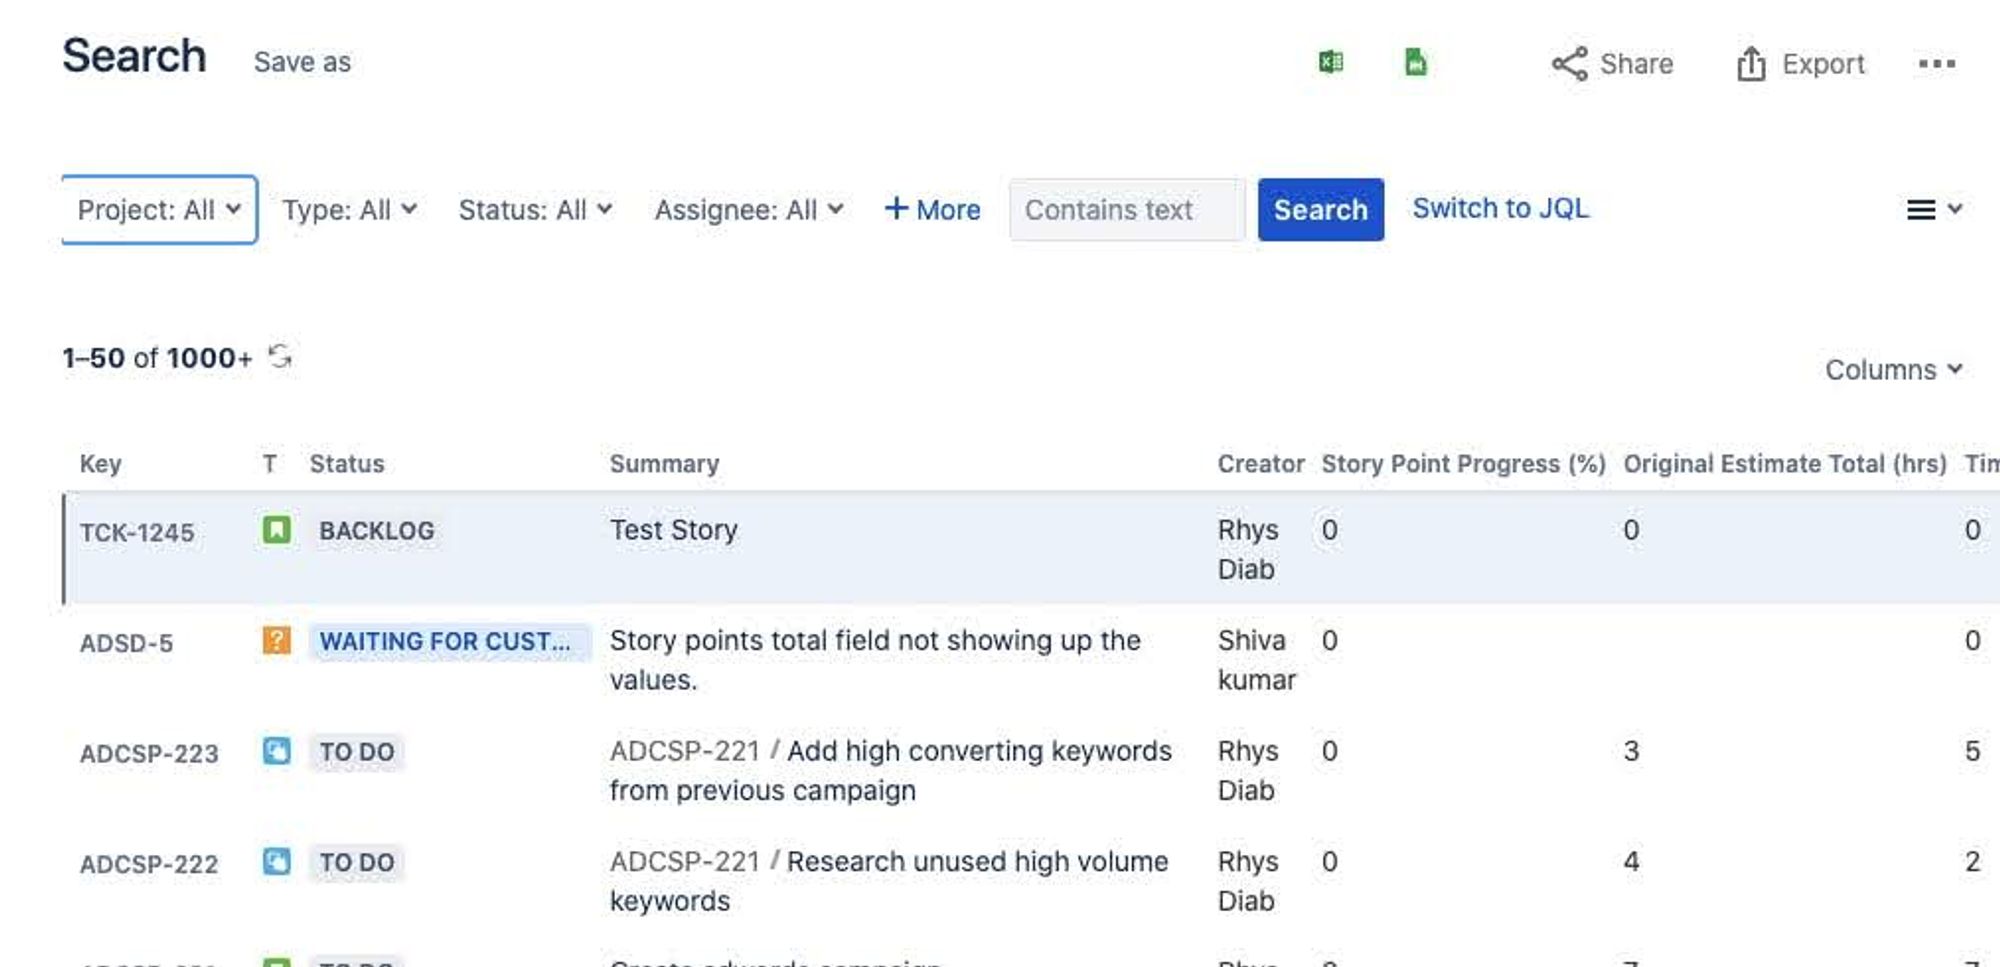
If the built-in queries don't have what you need and you're adept at using JQL, you can select 'Switch to JQL' and write your own query.
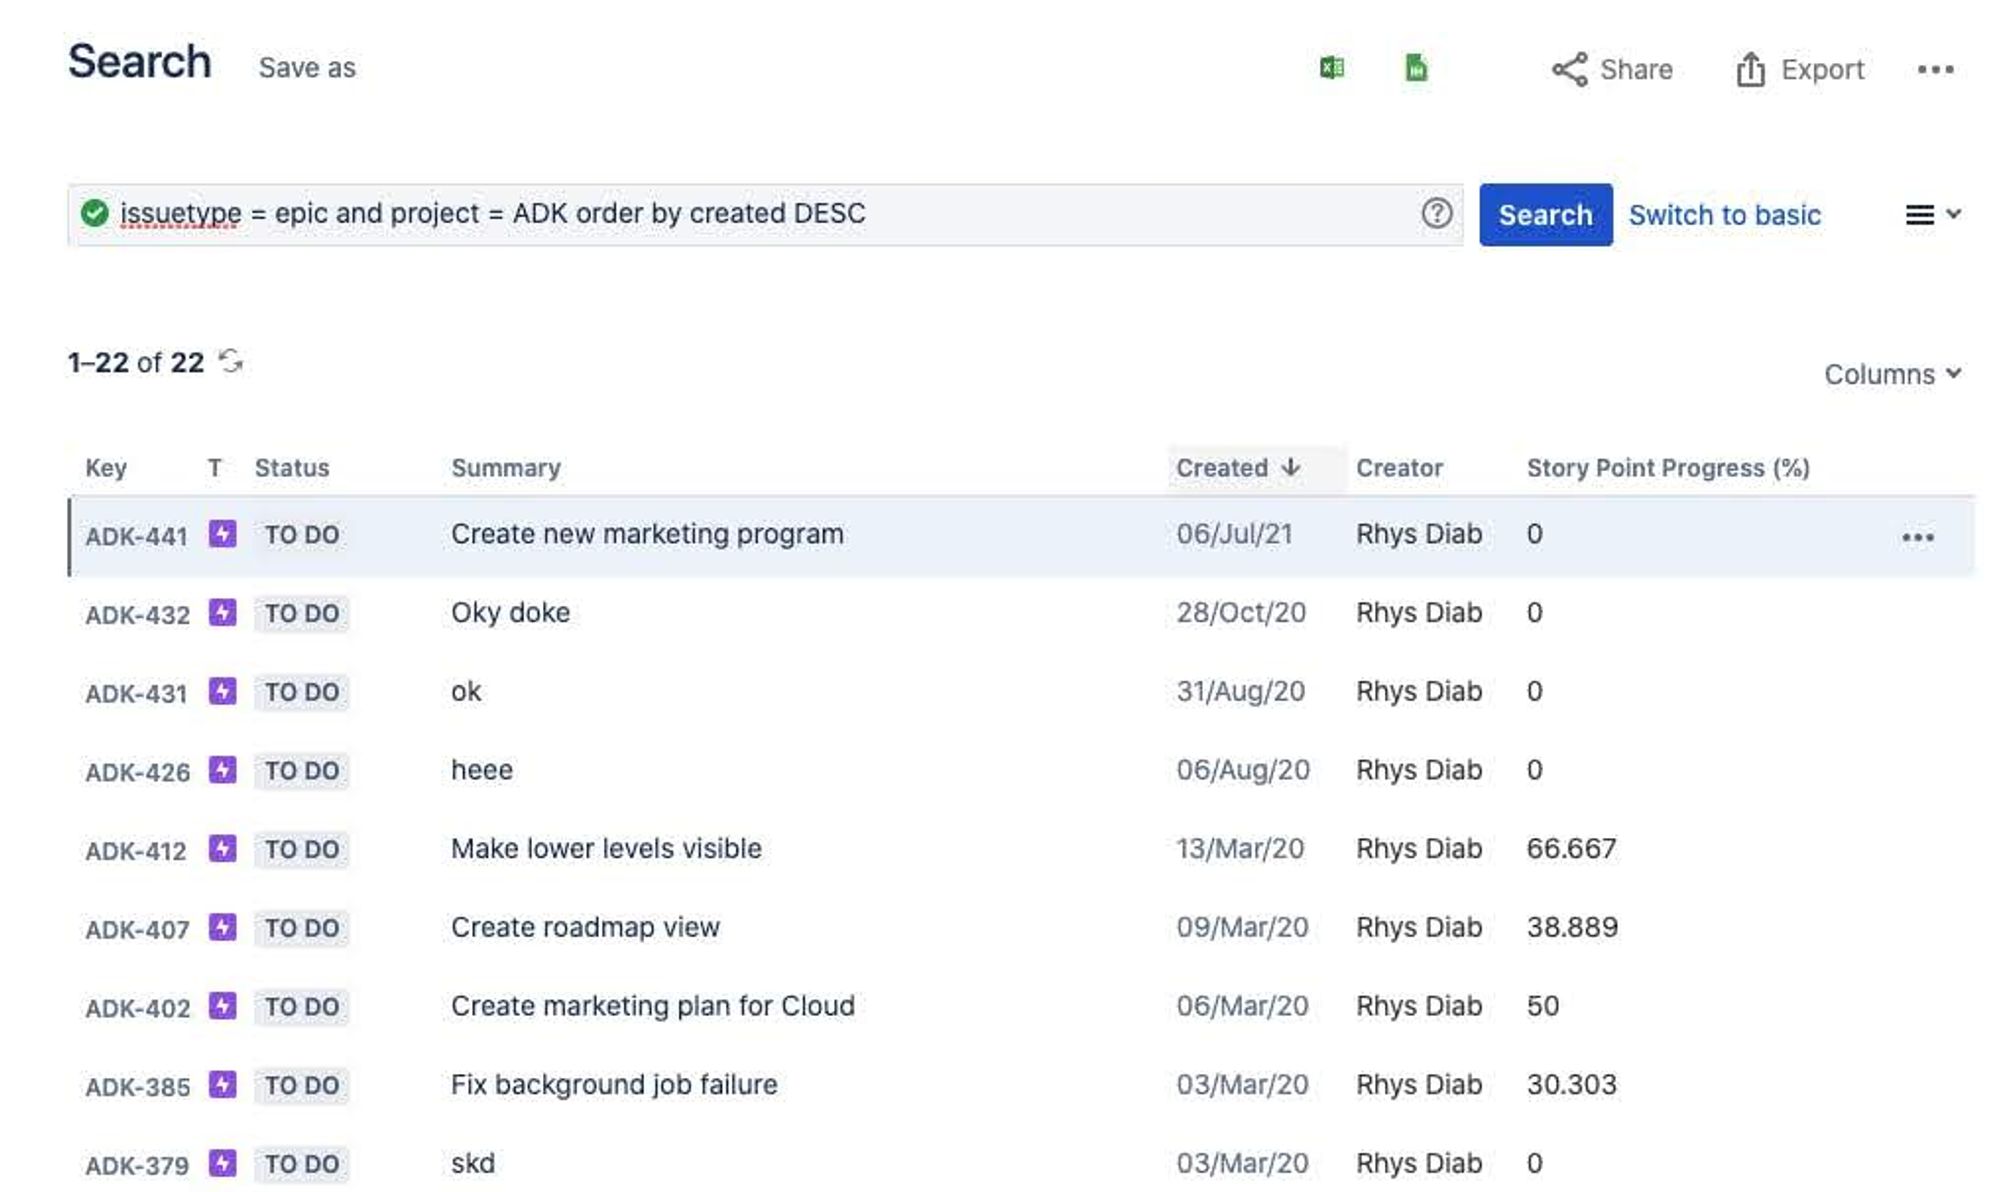
Once you have a query which brings up the issues you want to export:
4) Click 'Export' and 'Export Excel CSV (all fields)' or 'Export Excel CSV (current fields)'.

5) Save and open your CSV in Excel.
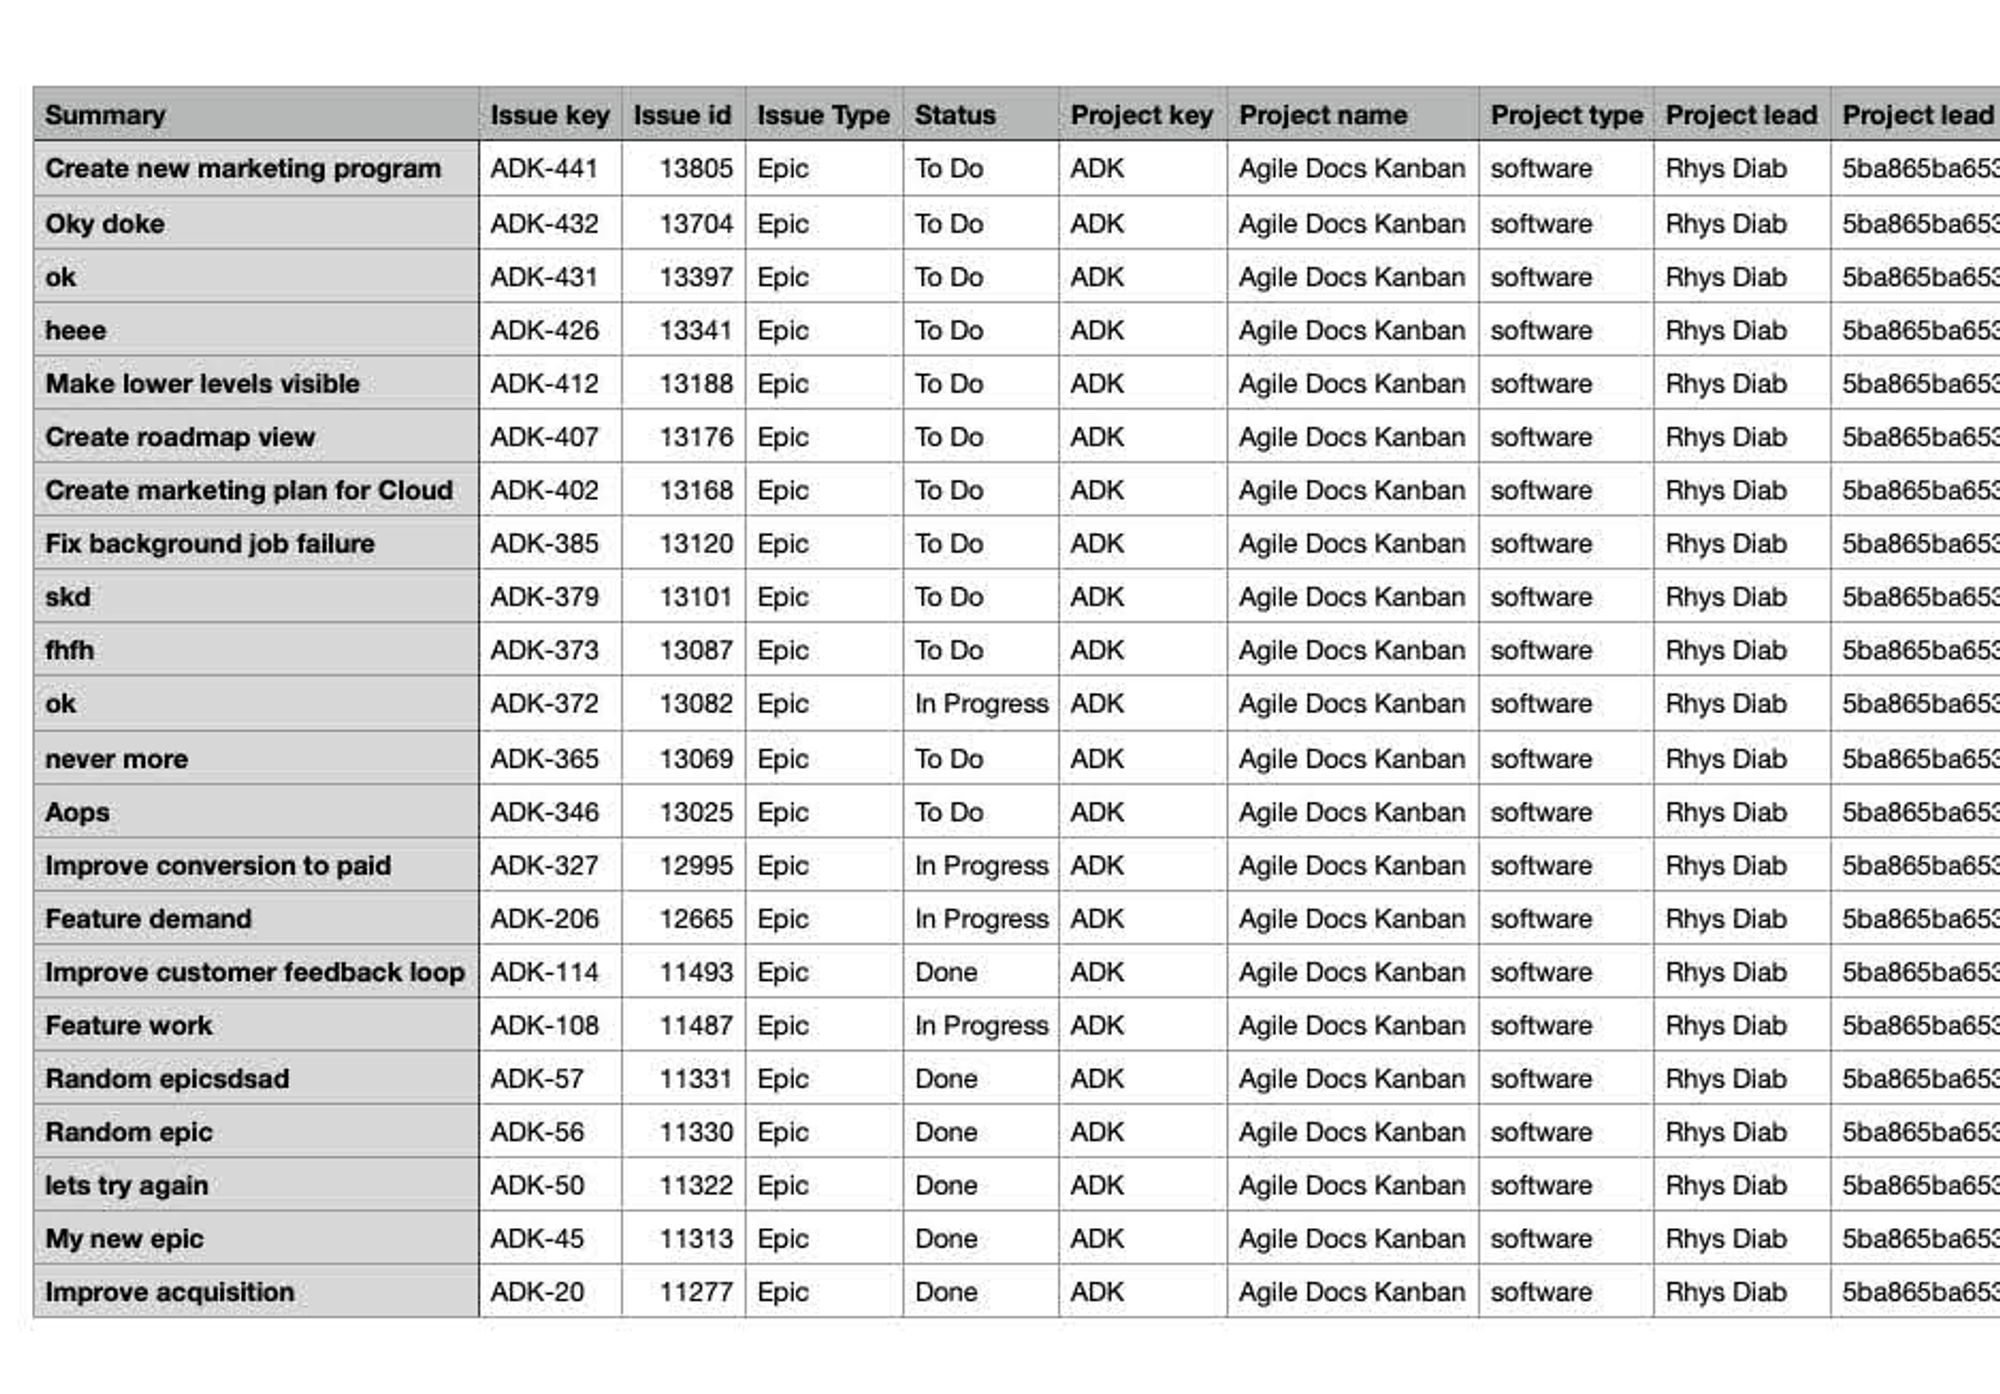
Voila! Your Jira issues are now in a CSV, complete with all of their fields, ready to import into Excel. This method is straightforward and reliable, but it's not a perfect solution.
One key drawback? There's no way to export your complete Jira issue hierarchy, even with JQL queries.
If you're like us and rely heavily on epics, stories, and sub-tasks in a multi-level hierarchy, then you might find yourself struggling to export and organise your data.
But don't worry—we've got a solution for that too!
Option B: use Hierarchy for Jira to export your entire Jira issue hierarchy and custom columns to a CSV
As mentioned above, Jira's native export tool only allows you to export a flat list of issues, so you're out of luck if you want to export your entire multi-level issue hierarchy.
But, there's a solution: meet Hierarchy for Jira.
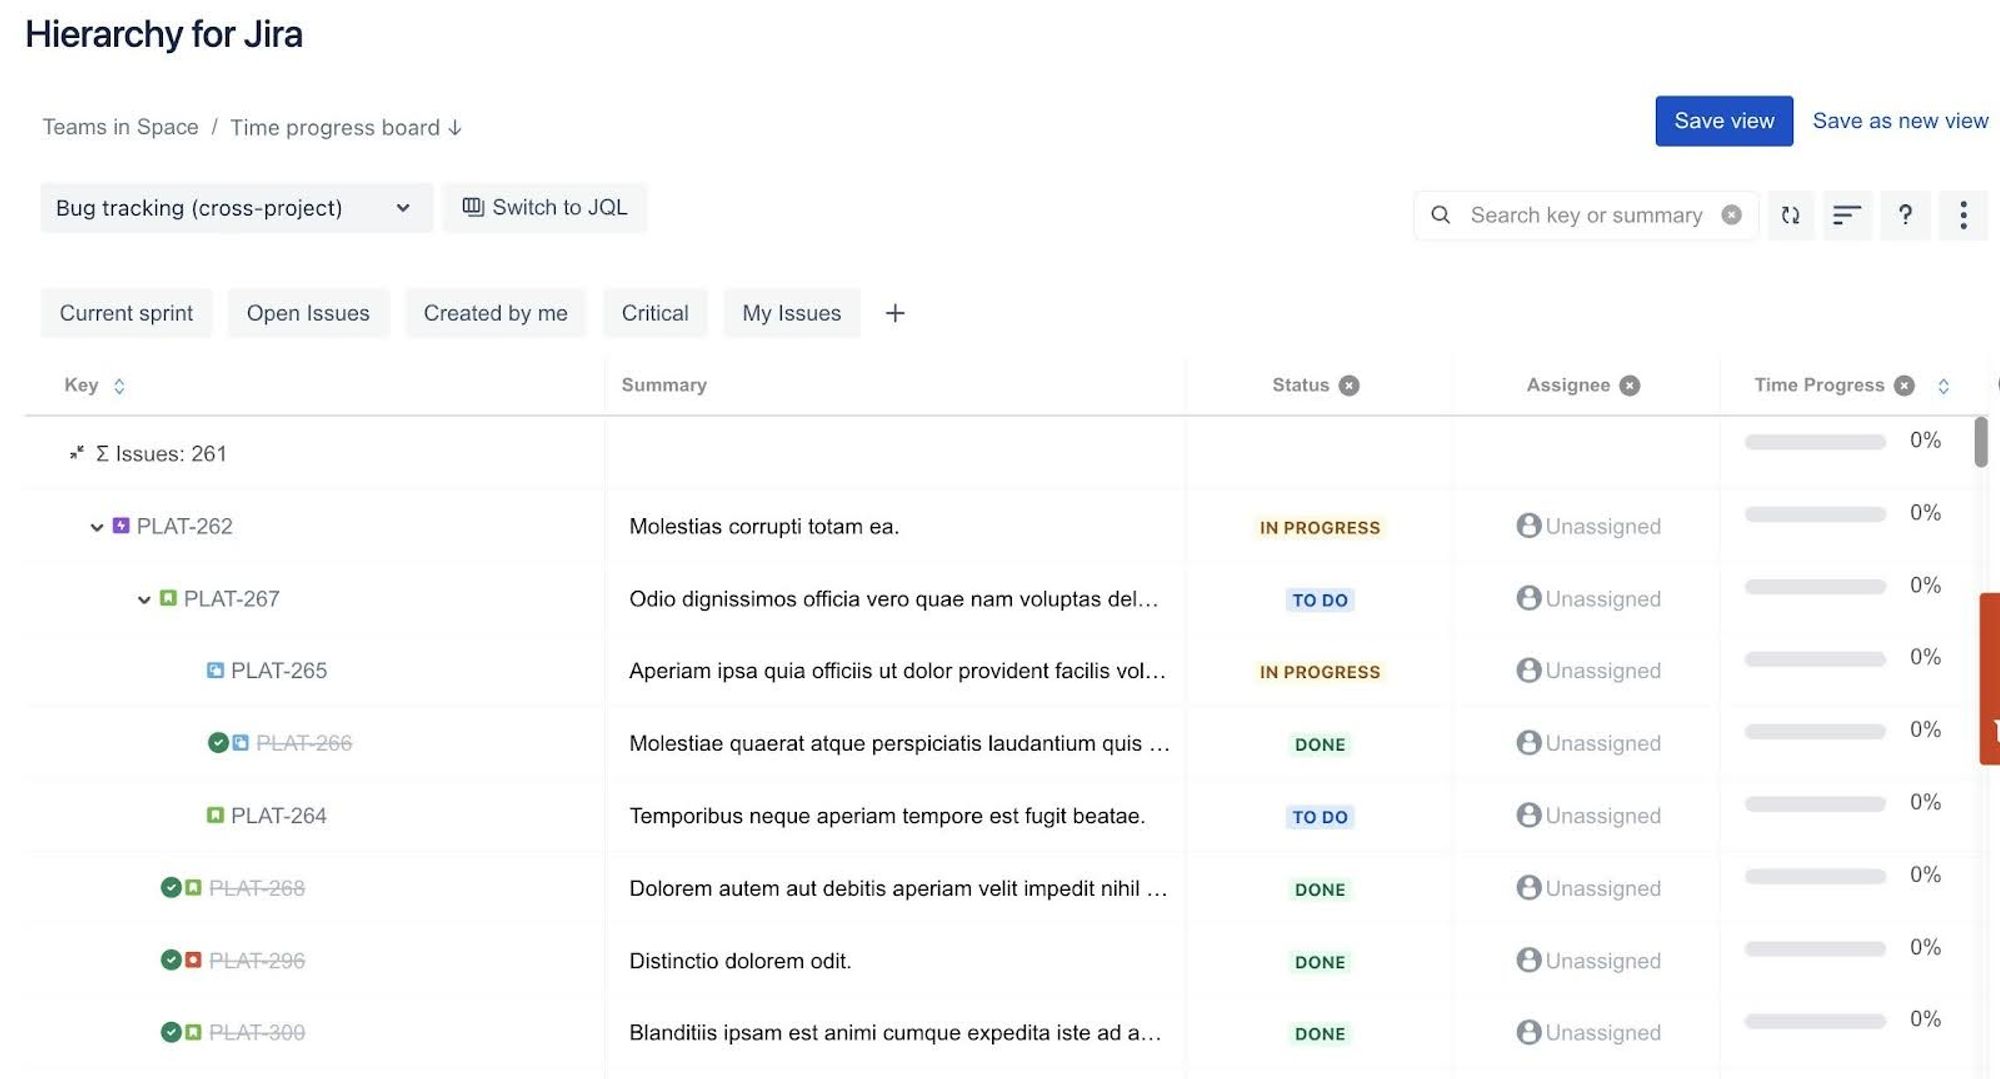
Hierarchy for Jira lets you visualise your JQL searches with any issue fields you want to see in a custom tree view.
Once you've got your perfect view, export it to a CSV and let Excel work its magic.
Thanks to the power of data, you'll be ready to supercharge your project insights within minutes!
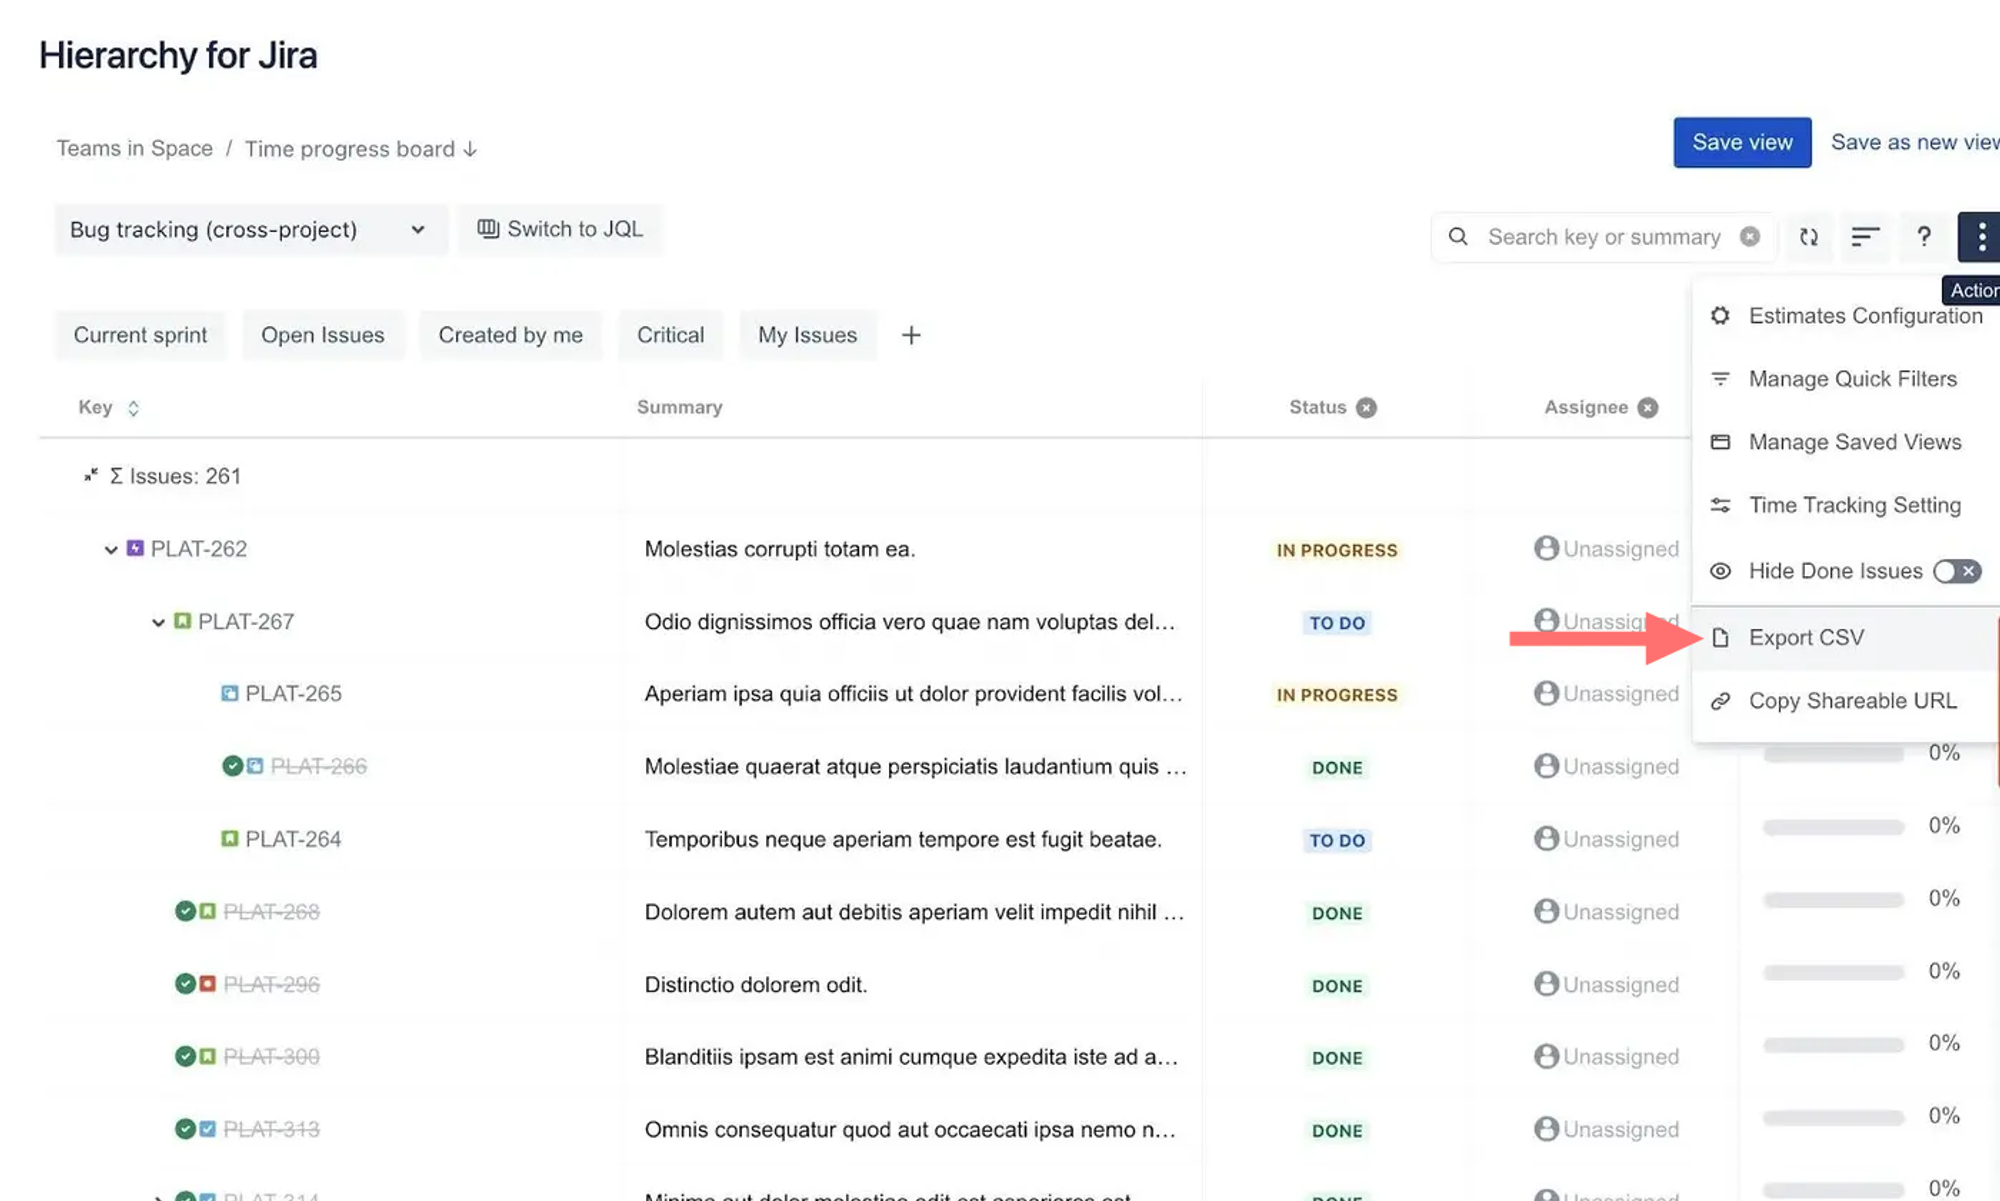
To use Hierarchy for Jira to export your issues to a CSV for use in Excel, follow these simple steps:
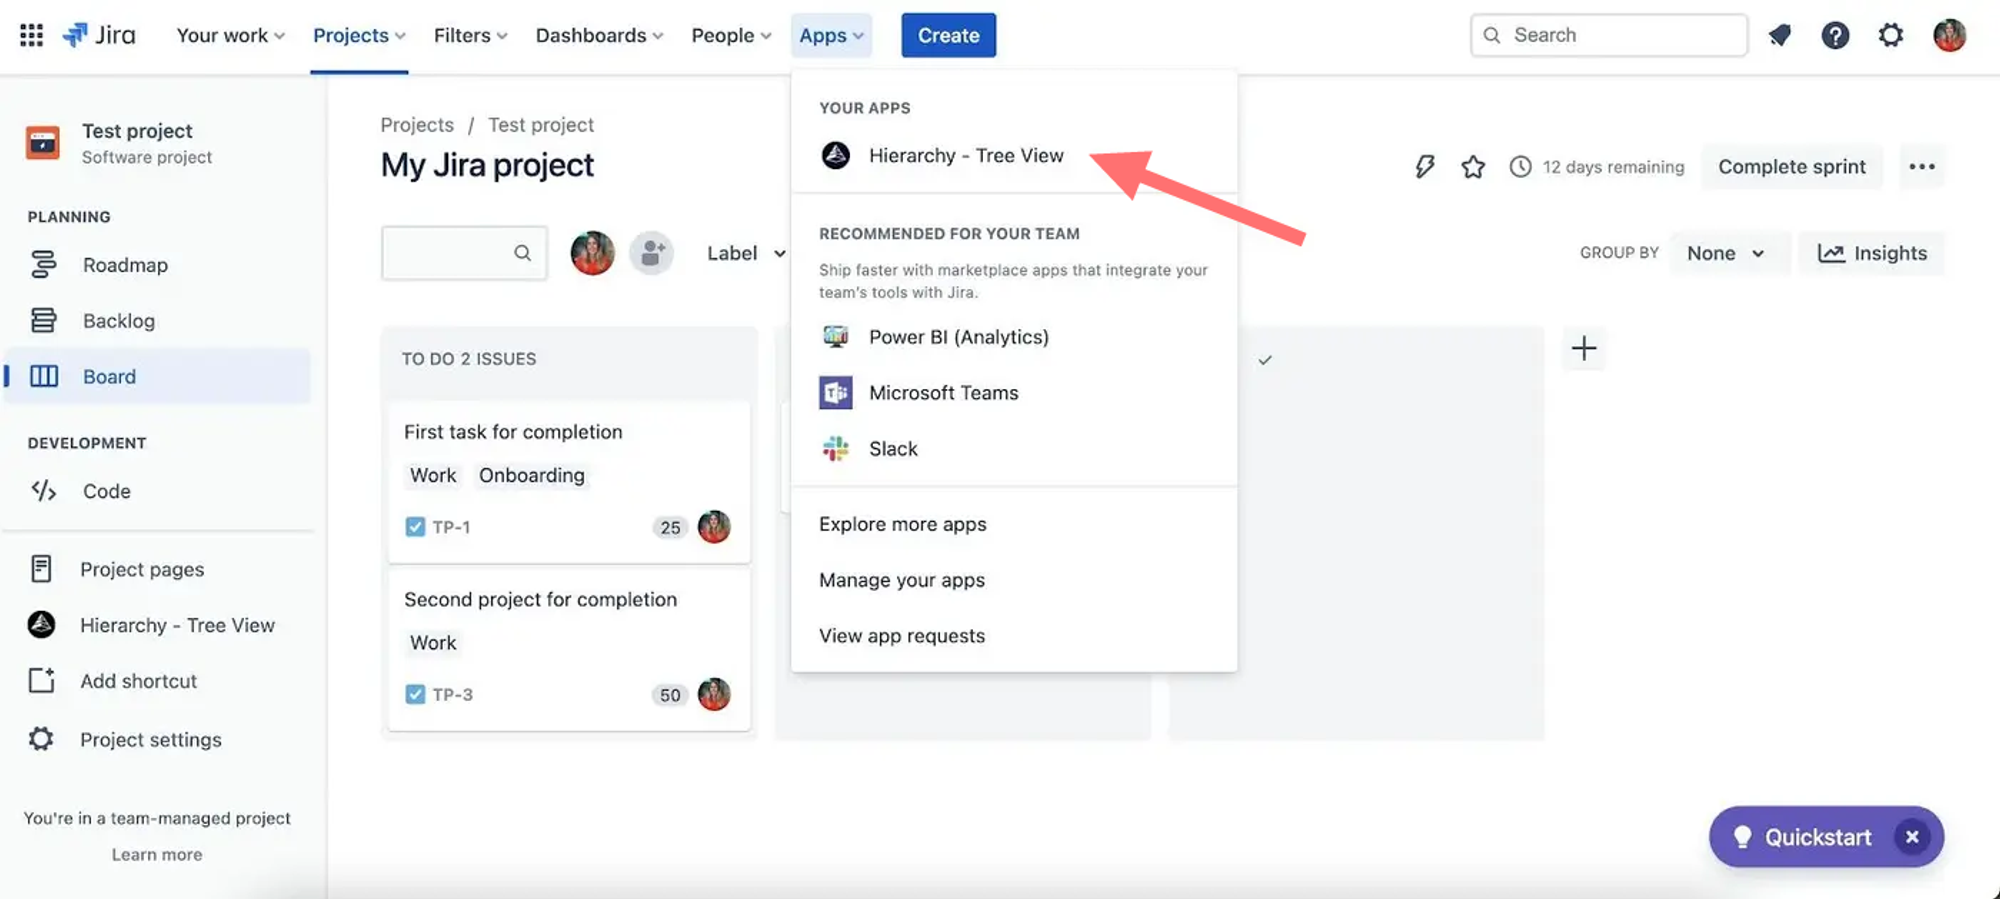
1) Select 'Apps' and then 'Hierarchy - Tree View' from the menu bar.
2) Click' Select Project or Filter' and scroll down to 'Saved Filters'
To save your JQL search as a filter, see Save your search as a filter.
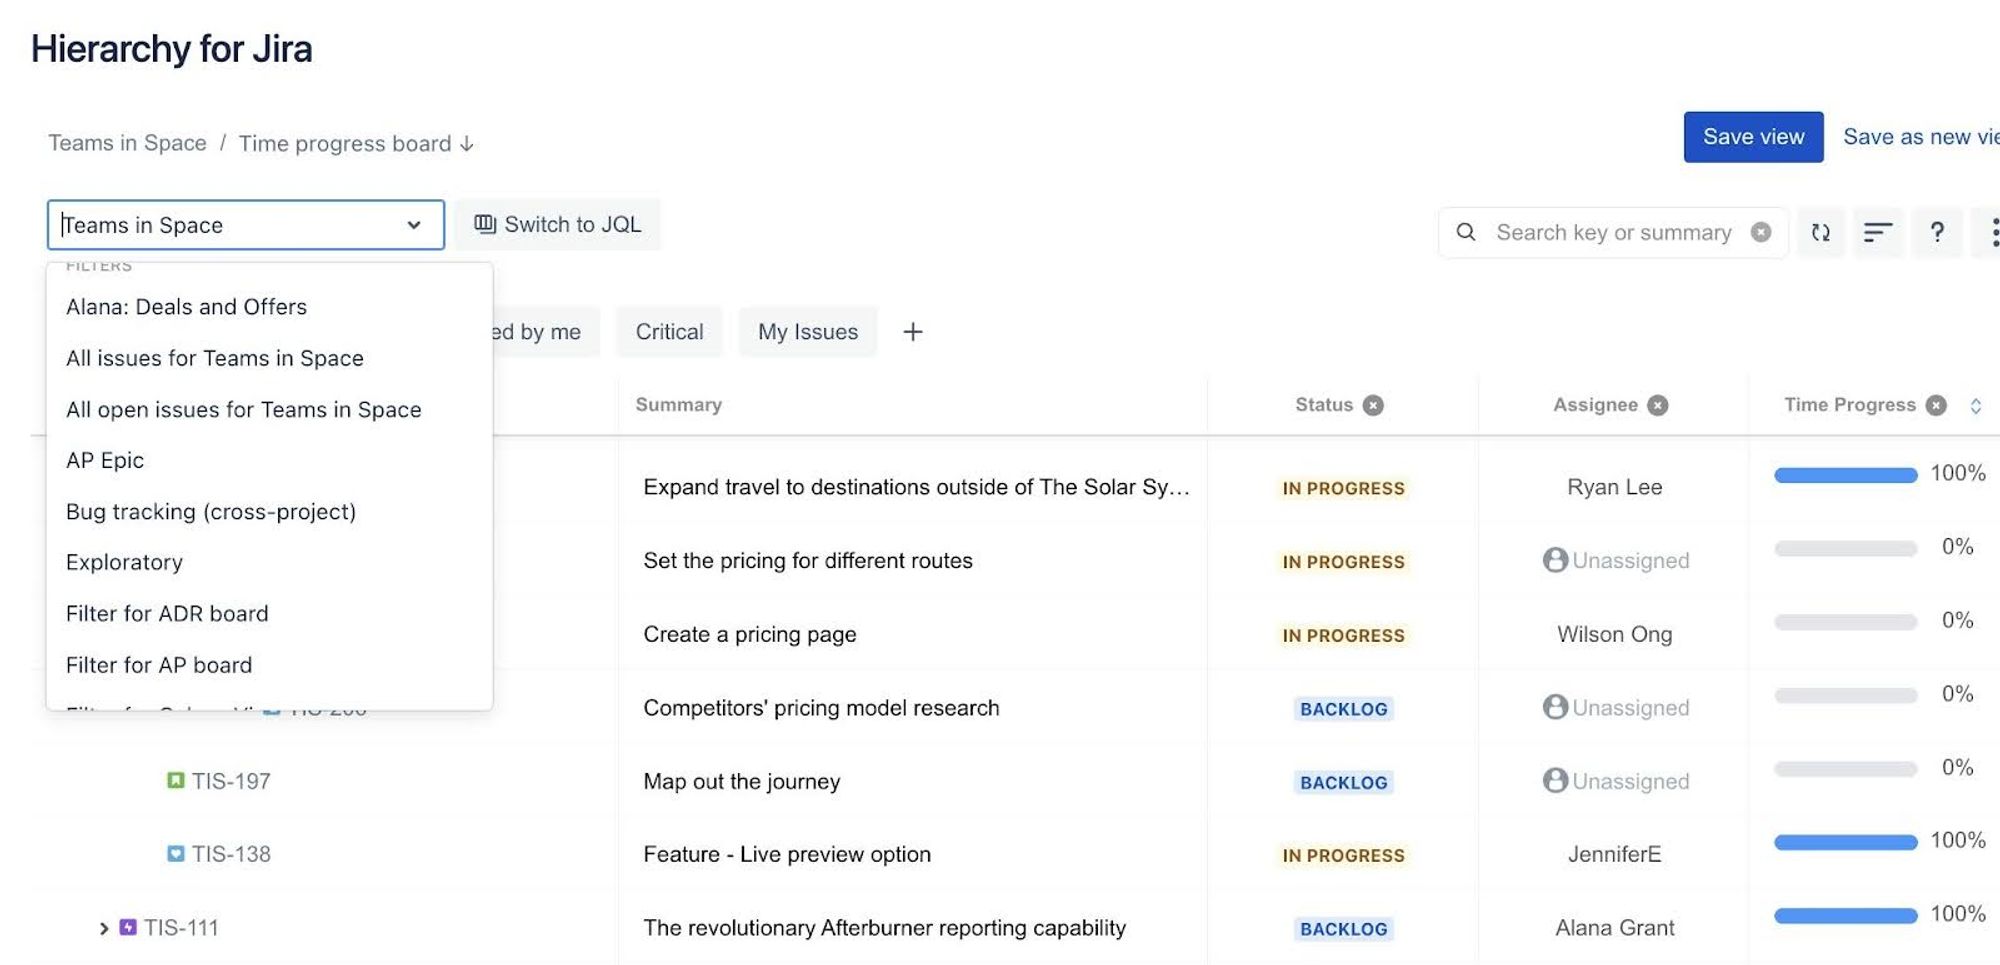
3) Select the filter which contains the issues you want to export.
4) Click 'Export CSV'.
5) Select where you want to save the CSV.
6) Open Excel and import your CSV.
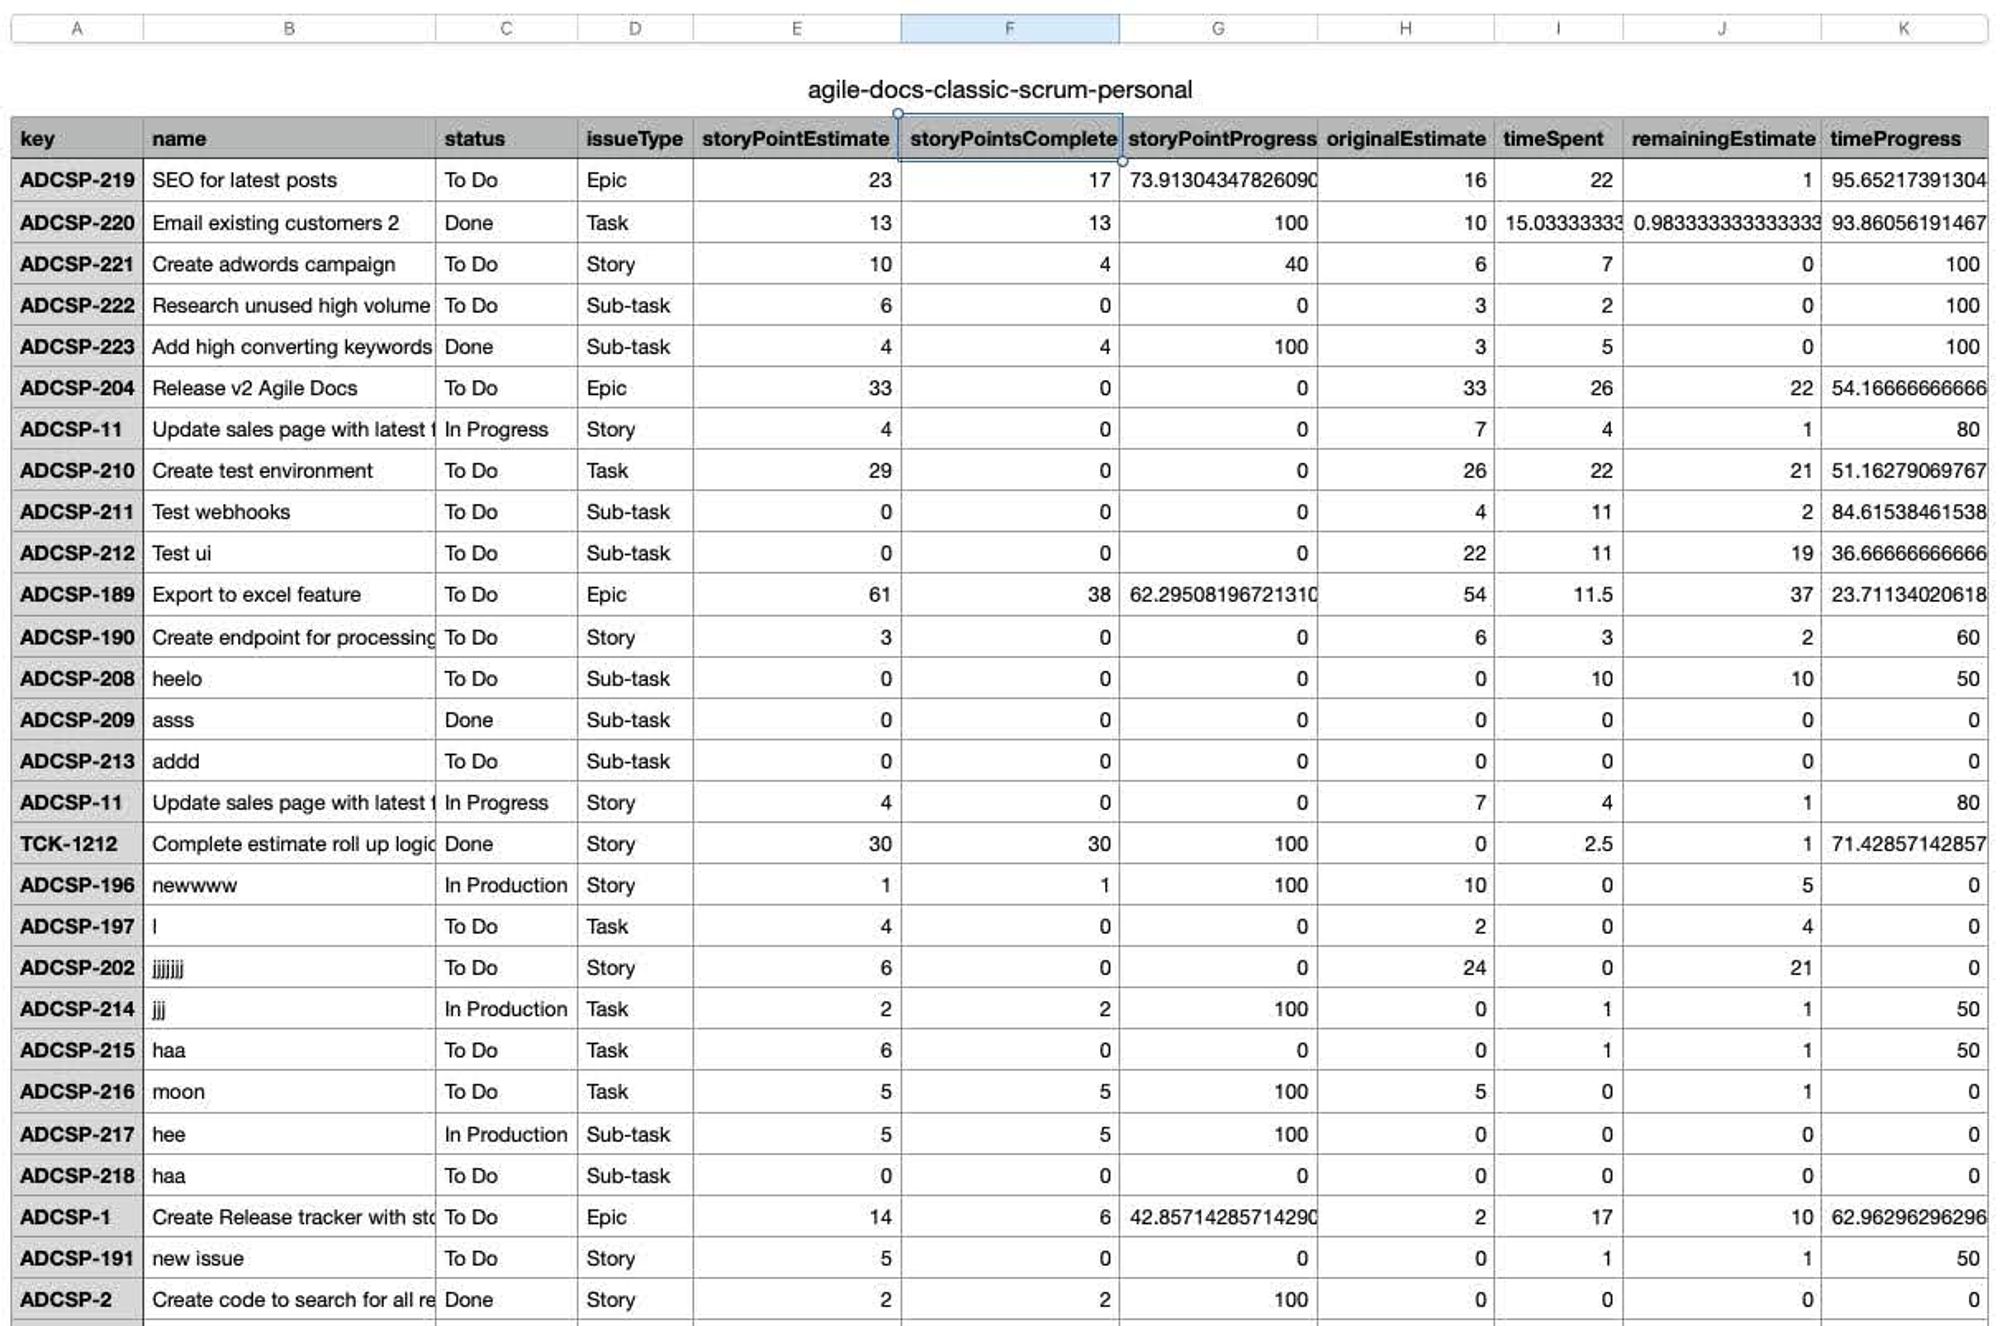
And there we have it—the perfect way to export your issues from Jira to Excel if you need more detail than just a flat list of issues!
The best part? You can try Hierarchy for Jira for free with a 30-day trial to see if it works for you!
Plus, if you're a team of less than 10 people, Hierarchy for Jira is completely free to use.
Run your first Jira to Excel export today with Hierarchy for Jira
If you're ready to go beyond Jira's built-in export feature, Hierarchy for Jira is here to streamline the way you manage exports for your complex issue hierarchy.
So, why not try it today with a completely free, 30-day trial?
Frequently asked questions
What are the main methods to export Jira issues to Excel?
There are two main methods to export Jira issues to Excel:
- Using Jira's built-in export feature, which allows you to export issues to a CSV file.
- Using Hierarchy for Jira, which lets you export your entire multi-level issue hierarchy along with custom columns to a CSV file.
How do I use Jira's built-in export feature to export issues to Excel?
o use Jira's built-in export feature:
- Go to 'Filters' and then 'View all filters'.
- Select 'Create filter'.
- Enter a JQL query to bring up the issues you want to export.
- Click 'Export' and choose either 'Export Excel CSV (all fields)' or 'Export Excel CSV (current fields)'.
- Save and open your CSV in Excel.
What are the limitations of Jira's native export tool?
The primary limitation of Jira's native export tool is that it only allows you to export a flat list of issues. This means you cannot export your complete Jira issue hierarchy, which can be a drawback if you rely on multi-level hierarchies like epics, stories, and sub-tasks.
How can I export my entire Jira issue hierarchy to Excel?
To export your entire Jira issue hierarchy, you can use our powerful app, Hierarchy for Jira. Here's how:
- Select 'Apps' and then 'Hierarchy - Tree View' from the menu bar.
- Click 'Select Project or Filter' and scroll down to 'Saved Filters'.
- Select the filter containing the issues you want to export.
- Click 'Export CSV'.
- Save the CSV and import it into Excel.
Is Hierarchy for Jira a paid app?
Hierarchy for Jira offers a 30-day free trial, allowing you to see if it meets your needs, risk-free. If your team consists of fewer than 10 people, Hierarchy for Jira is completely free to use.
Written by
Wilson Ong
Product Marketing Manager
Wilson is the former Product Marketing Manager for Hierarchy for Jira at Upscale. With a deep passion for being the voice of the customer and understanding market trends, he thrives on discovering new and innovative use cases for Hierarchy for Jira, empowering users and ensuring their success with our app.
Jira
Project Management